0. 프로젝트 소개
유튜브 시청자의 시선과 표정을 분석하여, 쇼츠나 하이라이트를 제작하기에 적합한 장면과 영역 추출해내는 프로젝트를 진행하고 있다.
예를 들어 1분 27초 ~ 1분 45초 구간에서 웃음이 지속적으로 감지되었고 특정 객체에 시선이 집중되었다고 하면,
해당 재생 구간, 그중에서도 집중된 객체가 있는 영역만을 잘라 쇼츠 영상을 만드는 것이다.
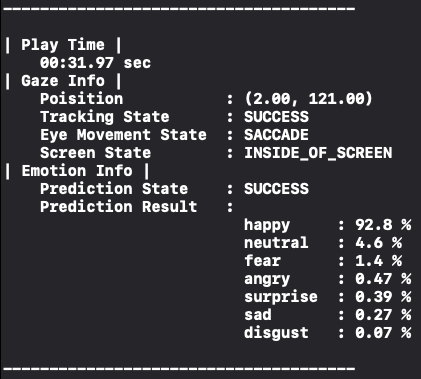
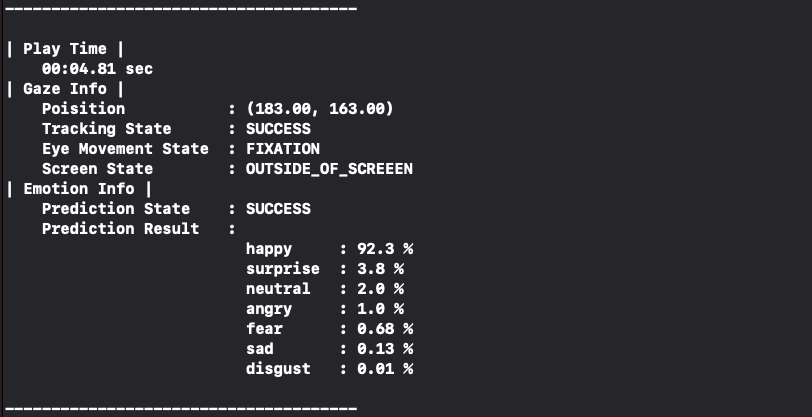
클라이언트에서는 영상 재생 시각 별 시선 데이터와 표정 데이터까지 추출하기로 하였다. 아래 결과 사진처럼,
"영상 재생 시각이 31초일 때, 시선은 디바이스의 (2, 121)을 향하고 happy 한 표정을 짓고 있었다"
라는 것을 영상 전체 재생 시간에 대해 구해주는 것이 목표이다.
따라서 우리가 구해야 하는 데이터는 총 3가지이다.
이 각각을 구한 뒤 하나로 합쳐주면 완성이다.
- 재생 시각
- 시선 데이터
- 표정 데이터
시선 데이터와 표정 데이터를 얻기 위해 모바일 디바이스의 전면 카메라를 사용해 얼굴을 캡쳐할 것이고,
캡처한 얼굴로부터 시선과 표정을 알아내는 작업은 인공지능을 통해 구현할 것이다.
이때 인공지능은 전부 On-device AI를 사용해서 개인 정보 유출 위험을 줄였다.
On-device 방식은 캡처한 얼굴 사진을 서버에 전송해서 서버에서 분석하고 결과를 다시 클라이언트로 보내주는 방식이 아니라,
서버 없이 모바일 디바이스 내에서 직접 AI 모델을 돌리는 방식을 말한다.
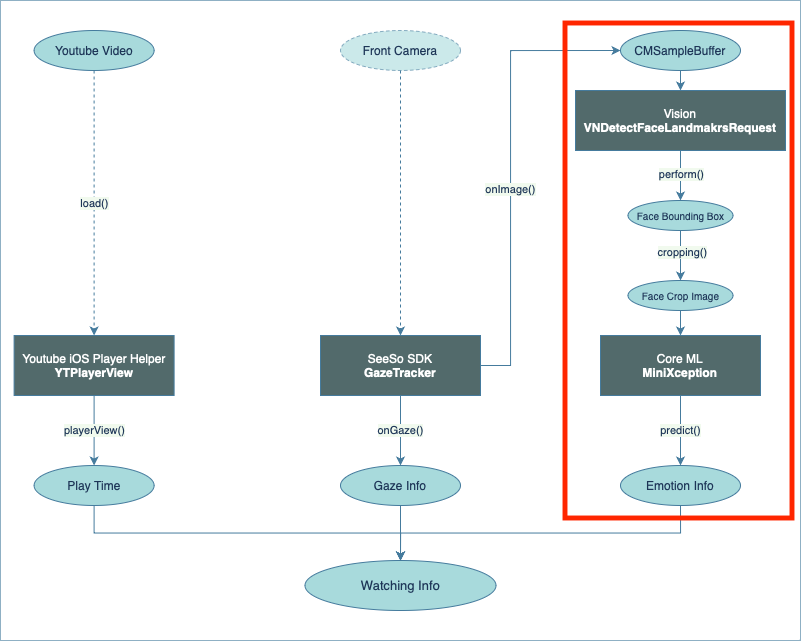
위의 3가지 데이터를 만들고 하나로 합쳐주는 과정을 다이어그램으로 나타내면 다음과 같다.

아래 세 가지를 단계별로 구현하여 최종적으로 영상 재생 시각별 시선 데이터와 표정 데이터를 만들어보자.
- 유튜브 영상 임베드
- 시선 추적
- 표정 분석
1. 유튜브 영상 임베드
첫번째로 할 일은 유튜브 영상을 임베드하여 보여주고, 영상 플레이어로부터 재생 시각을 얻어오는 것이다.

영상 임베드 및 재생에는 Youtube iOS Player Helper라는 라이브러리를 사용하였고,
해당 라이브러리에서 제공하는 TYPlayerView에서 playTime 값을 가져오는 방식으로 구현하였다.
세부 구현 단계는 다음과 같다.
- 라이브러리 설치
- 플레이어 뷰 추가
- 영상 로드
- 델리게이트 구현
1-1. 라이브러리 설치
유튜브 영상 임베드는 웹뷰를 사용해서 직접 구현할 수 있다.
하지만 믿음직스러운 공식 라이브러리가 존재하므로 이것을 사용하자.
Youtube iOS Player Helper는 Youtube에서 제공하는 공식 라이브러리다.
개발 문서는 여기에서 확인할 수 있다.
GitHub - youtube/youtube-ios-player-helper: Lightweight helper library that allows iOS developers to add inline playback of YouT
Lightweight helper library that allows iOS developers to add inline playback of YouTube videos through a WebView - GitHub - youtube/youtube-ios-player-helper: Lightweight helper library that allows...
github.com
내부적으로는 WKWebView를 통해 인라인 재생을 하도록 구현되어 있는 것으로 보인다.

먼저 라이브러리를 설치해주자.
CocoaPods랑 SPM 모두 지원하니 편한 방법으로 추가하면 되겠다.
CocoaPods
Podfile에 다음과 같은 라인을 추가하고 "x.y.z" 부분에는 최신 버전을 적어준다.
pod "youtube-ios-player-helper", "~> x.y.z"
Swift Package Manager
아래 Package URL로 Package dependencies를 추가한다.
https://github.com/youtube/youtube-ios-player-helper.git
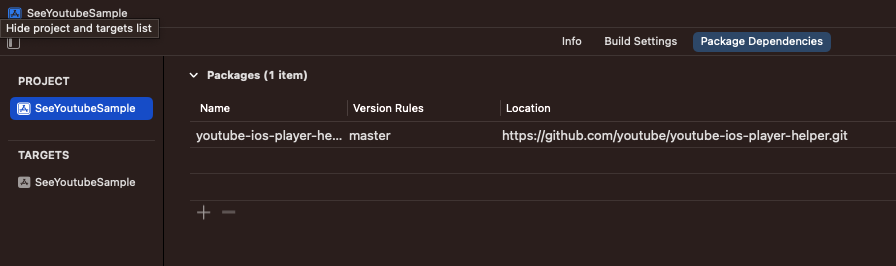
이번 포스팅에서는 SPM으로 설치해보자.
[Project > Package Dependency > +]을 누르면 패키지 검색 창이 뜬다.
위에서 안내한 Package URL을 검색하면 youtube-ios-player-helper가 검색된다.
해당 소스를 선택하고 우측 하단 [Add Package] 클릭.

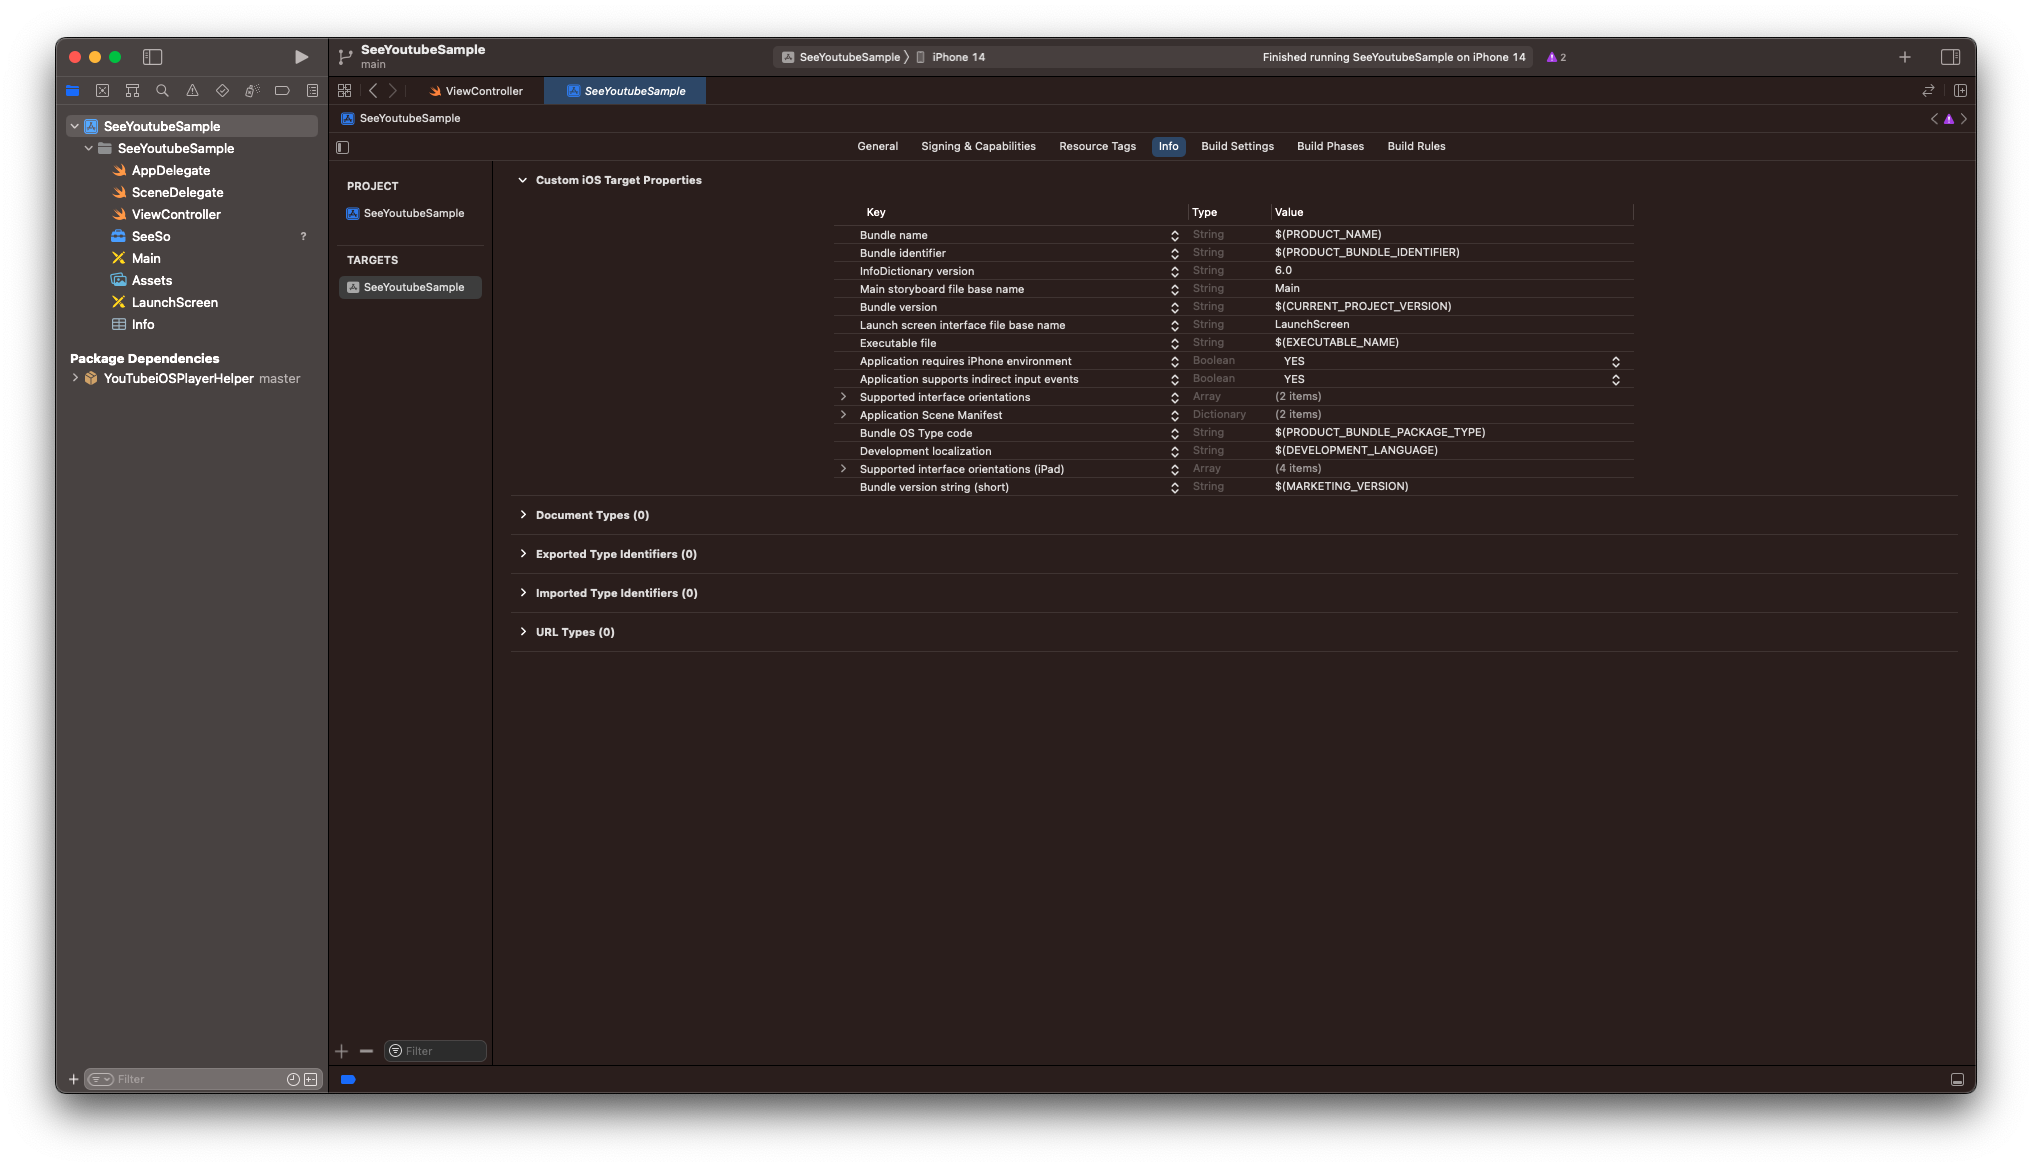
설치가 완료될 때까지 기다리면 아래와 같이 Package Dependency가 추가된 것을 확인할 수 있다.
1-2. 플레이어 뷰 추가
유튜브 영상을 재생하려면 영상을 표시할 뷰가 필요하다.
영상을 표시하고 싶은 위치에 UIView를 추가해주자.
영상이 대부분 16:9 비율이라 Aspect Ratio를 16:9로 주었다.
(왼쪽 빈 공간은 나중에 표정 분석 기능을 추가할 때 카메라 프리뷰와 표정 분석 결과를 표시할 공간을 남겨둔 것이다.)

Identity Inspector 화면에서 클래스를 YTPlayerView로 변경한다.

ViewController로 이동하여 방금 생성한 뷰를 IBOutlet으로 추가한다.
@IBOutlet weak var playerView: YTPlayerView!
그럼 "Cannot find type 'YTPlayerView' in scope"라는 에러가 뜰 텐데, 라이브러리 import를 안 해줘서 그렇다.
YoutubeiOSPlayerHelper를 import 해주자.
import YouTubeiOSPlayerHelper
1-3. 영상 로드
원하는 영상을 로드하려면 해당 영상의 ID를 알아야 한다.
유튜브 영상 주소에서 v= 뒤에 오는 것이 영상 ID이다.
아래 주소에서 M7lc1UVf-VE이 영상 ID이다.
원하는 영상의 ID를 복사해두자.
https://www.youtube.com/watch?v=M7lc1UVf-VE
영상을 로드하는 load 함수는 여러 개가 있는데, 그중에서 우리가 사용할 것은 이것이다.
func load(withVideoId videoId: String, playerVars: [AnyHashable : Any]?) -> Bool
두 개의 파라미터를 살펴보자.
withVideoId
이름 그대로 영상 id를 넘겨주면 된다.
playerVars
영상 재생과 관련된 추가 옵션을 지정하는 파라미터이다.
예를 들어 자동 재생을 하려면 ["autoplay": "1"]로 주면 된다.
매우 다양한 파라미터들이 있는데 여기에서 확인할 수 있다.
타입이 옵셔널이므로, 디폴트 설정 그대로 재생해도 괜찮다면 전달해주지 않아도 된다.
위의 load 함수를 사용하여 ViewController에 영상을 로드하는 메소드 loadVideo(with:)를 구현하자.
private func loadVideo(with id: String) {
    self.playerView.load(withVideoId: id, playerVars: ["playsinline": "1",
                                                       "controls": "0"])
}
두 개의 플레이어 매개변수를 전달하였다.
각각의 역할은 아래와 같다.
playsinline
동영상을 인라인으로 재생할지 전체 화면으로 재생할지 여부를 나타낸다.
0: 전체 화면 (default)
1: 인라인 재생
controls
동영상 플레이어 컨트롤을 표시할지 여부를 나타낸다.
0: 컨트롤 표시 안 함
1: 컨트롤 표시 (default)
우리는 인라인으로 표시하고, 시청자가 영상 구간을 건너뛸 수 없도록 컨트롤을 막아야 한다.
따라서 playsinline = 1, controls = 0으로 주었다.
ViewController의 viewDidLoad()에서 loadVideo(with:)를 호출하여 테스트해보자.
override func viewDidLoad() {
    super.viewDidLoad()
    self.loadVideo(with: "M7lc1UVf-VE")
}
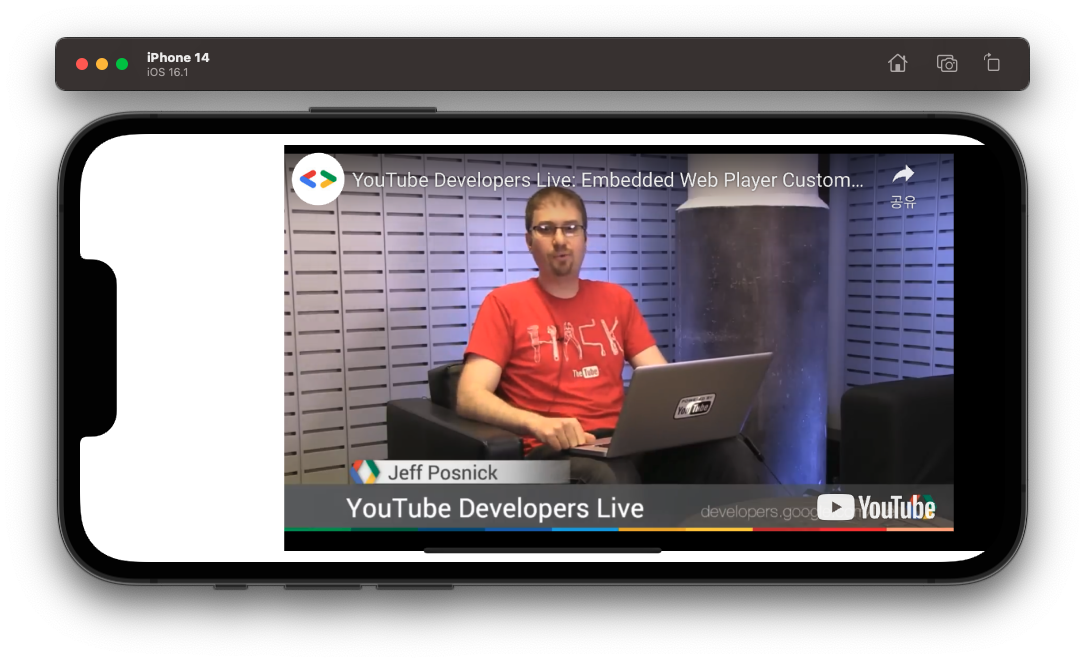
시뮬레이터에서 실행해본 결과, 플레이어 뷰에 영상이 잘 로드되었다.
재생을 시작해도 전체 화면으로 전환되지 않고, 아래 컨트롤 바도 잘 숨겨져 있다.
1-4. 델리게이트 구현
현재 플레이 중인 비디오의 재생 시각은 YTPlayerViewDelegate의 playerView(_:didPlayTime)를 통해 알 수 있다.
func playerView(_ playerView: YTPlayerView, didPlayTime playTime: Float)
ViewController에 YTPlayerViewDelegate를 채택하고 playerView(_:didPlayTime)을 구현하자.
// MARK: YTPlayerViewDelegate
extension ViewController: YTPlayerViewDelegate {
    func playerView(_ playerView: YTPlayerView, didPlayTime playTime: Float) {
        print(playTime)
    }
}
그리고 loadVideo(with:)에 playerView의 YTPlayerViewDelegate를 설정하는 코드를 추가한다.
이러면 델리게이트 관련 작업은 끝났다.
private func loadVideo(with id: String) {
    self.playerView.delegate = self	// 추가
    self.playerView.load(withVideoId: id, playerVars: ["playsinline": "1",
                                                       "controls": "0"])
}
이제 실행해서 재생 시각이 잘 얻어와지고 있는지 확인하자.
콘솔창을 확인해보면 0.5초 정도의 간격으로 재생 시각이 잘 출력되고 있는 것을 볼 수 있다.
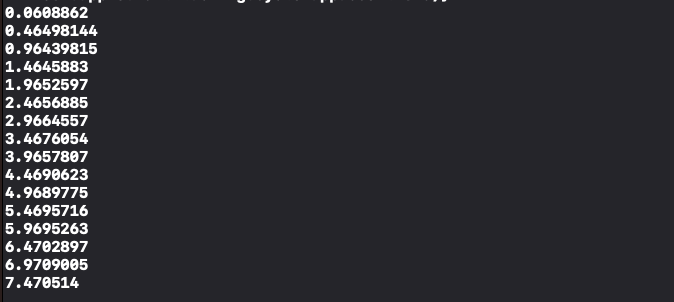
이렇게 첫 번째 단계인 유튜브 영상 임베드를 마쳤다.
2. 시선 추적
두 번째로 할 일은,
전면 카메라를 이용하여 얼굴을 캡처하고, 인공지능을 사용하여 캡처 이미지로부터 시선 데이터를 얻어내는 것이다.

마침 AI 기반의 아이트래킹 SDK가 있어서 이것을 사용해서 구현하였다.
세부 구현 단계는 다음과 같다.
- 프레임워크 추가
- 라이선스 키 발급
- 카메라 권한 설정
- GazeTracker 생성: InitializationDelegate 구현
- 트래킹 시작: StatusDelegate 구현
- 시선 데이터 확인: GazeDelegate 구현
- GazePointView 추가
- 캘리브레이션 추가
- 비디오 좌표와 시간으로 변환
2-1. 프레임워크 추가
시선 추적은 원래 VR 같이 생긴 아이트래킹 장비가 필요한 경우가 많은데,
인공지능을 기반으로 하여 일반 디바이스 RGB 카메라로도 시선 추적이 가능한 SDK를 찾았다.
SeeSo라는 SDK인데 개발용 라이선스는 무료이다.
SeeSo::The gaze tracker
SeeSo, the real-time gaze tracking SDK for the mobile environment. With a users' vision, reach beyond the vision.
seeso.io
개발사에서 제공하는 스펙을 확인해보니 다행히 iOS를 지원해주고
그리고 우리가 필요한 데이터 (x, y) coordinates, fixation까지 제공해준다.
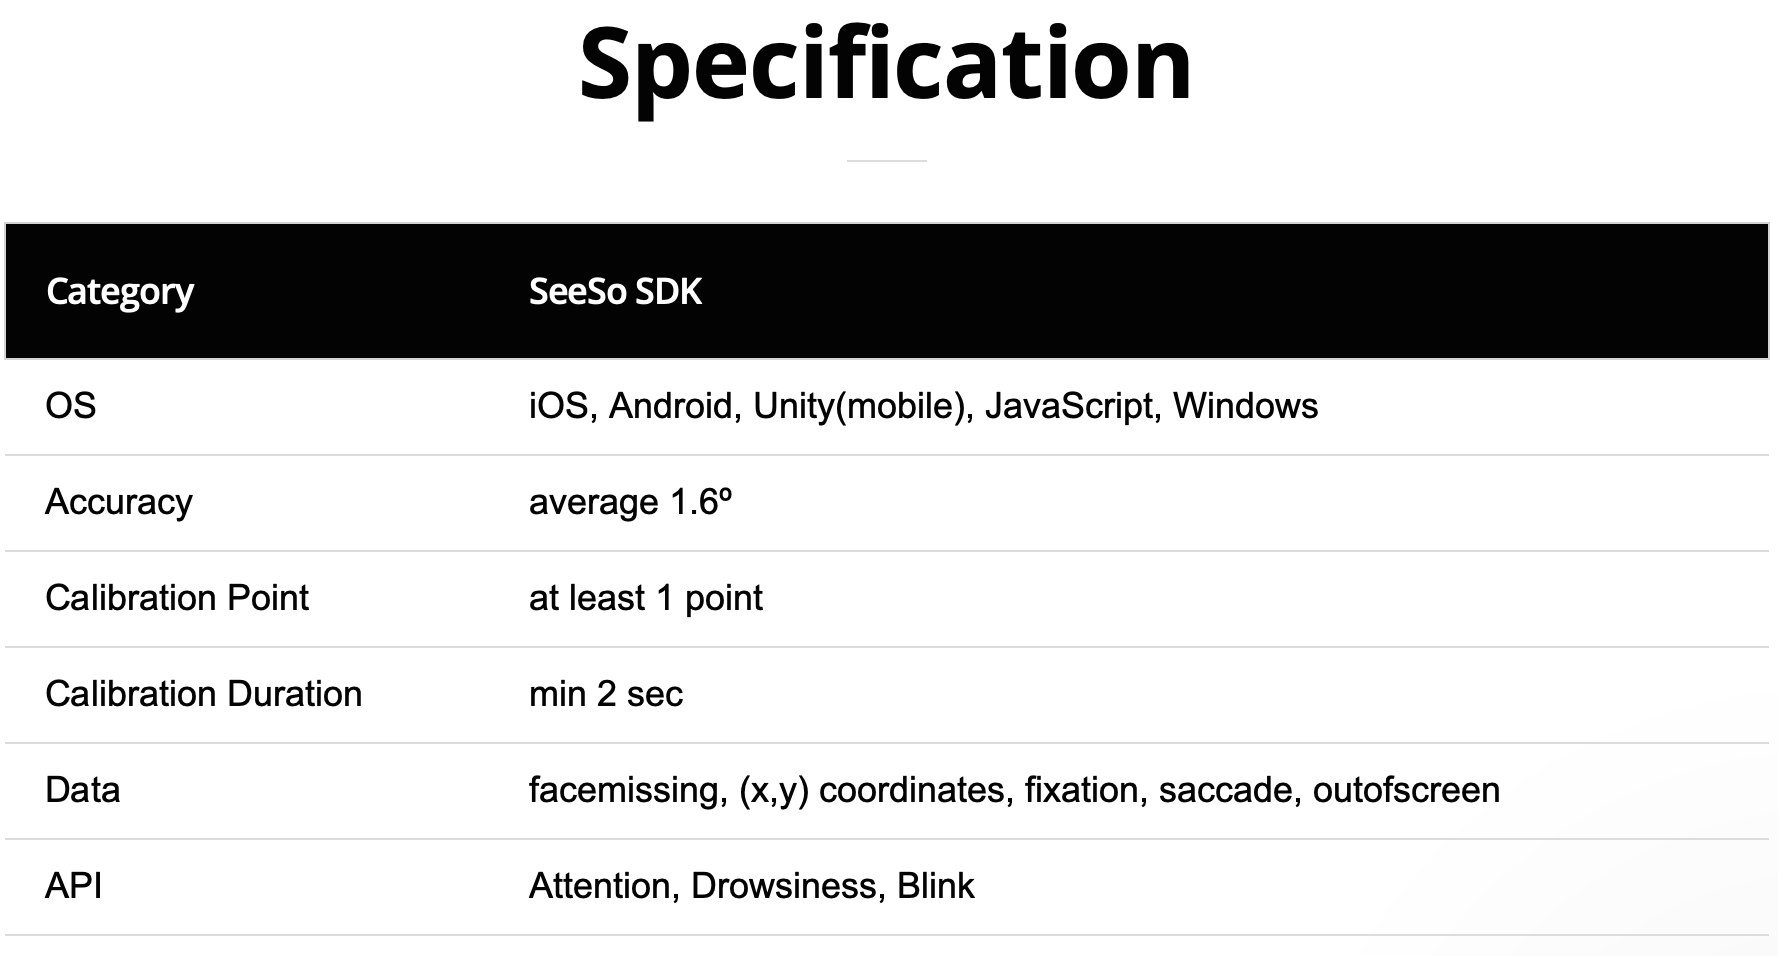
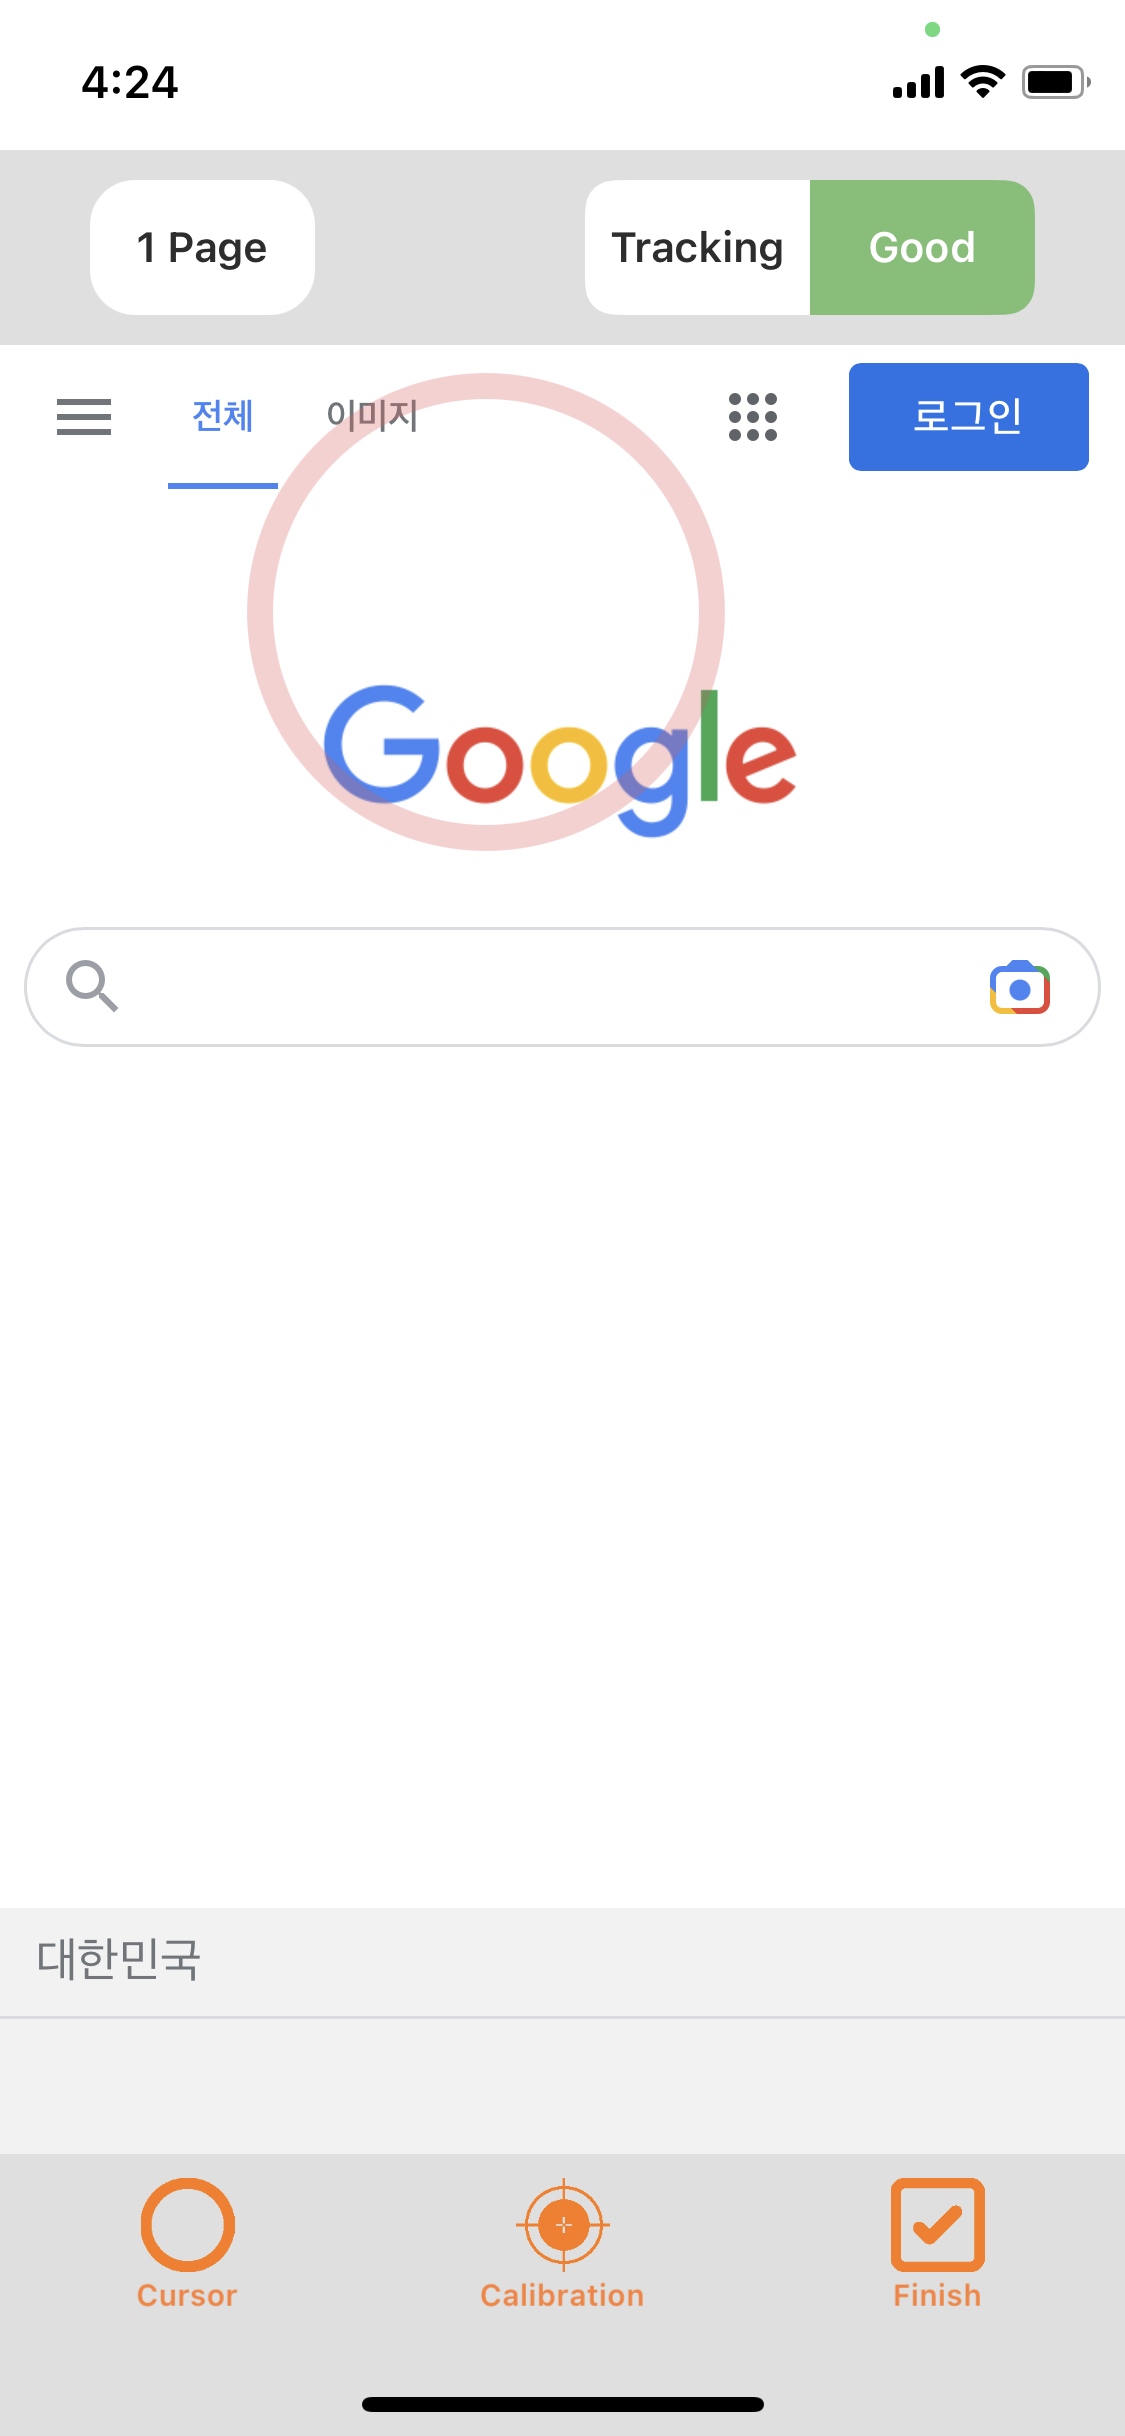
개발사에서 제공하는 데모를 사용해보았는데 정확도도 좋아서 최종적으로 이 SDK를 사용하기로 했다.
아래 사진이 데모 앱 캡처 화면이다. 빨간색 동그라미가 시선에 따라 움직인다.
SeeSo SDK의 동작 방식은
처음 Authorization만 네트워크를 통해 SeeSo Server에서 수행하고,
이후 시선 추적 데이터 생성은 전부 On-device로 이루어진다.
여기 개발 문서에서 동작 방식 구조도를 확인할 수 있다.
다시 개발로 돌아가서, SDK를 사용하려면 먼저 SDK를 다운로드하여야 한다.
SeeSo Console에 가입한 뒤 SDK 메뉴로 들어간다.
iOS(Swift) Release 버전을 다운로드 링크를 클릭한다.
그럼 SeeSo.xcframework가 다운로드될 것이다.

이제 다운로드한 프레임워크를 프로젝트에 추가해주자.
SeeSo.xcframework 파일을 드래그 앤 드롭으로 프로젝트 폴더 바로 아래에 넣는다.

아래와 같이 Copy items if needed를 체크하고 [Finish]

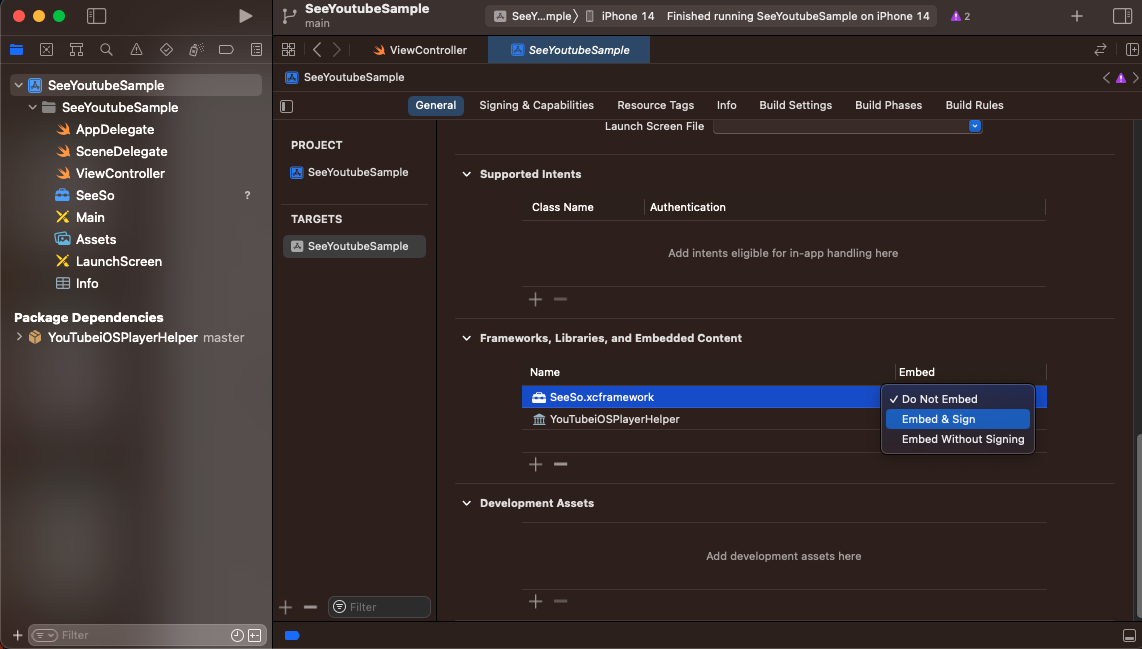
[TARGETS > GENERAL > Framworks, Libraries, and Embedded Content]로 이동하면
SeeSo 프레임워크가 생긴 것을 볼 수 있다.
여기서 Embed 상태를 Embed & Sign으로 변경해준다.
2-2. 라이선스 키 발급
SeeSo SDK를 사용하려면 라이센스 키를 발급받아야 한다.
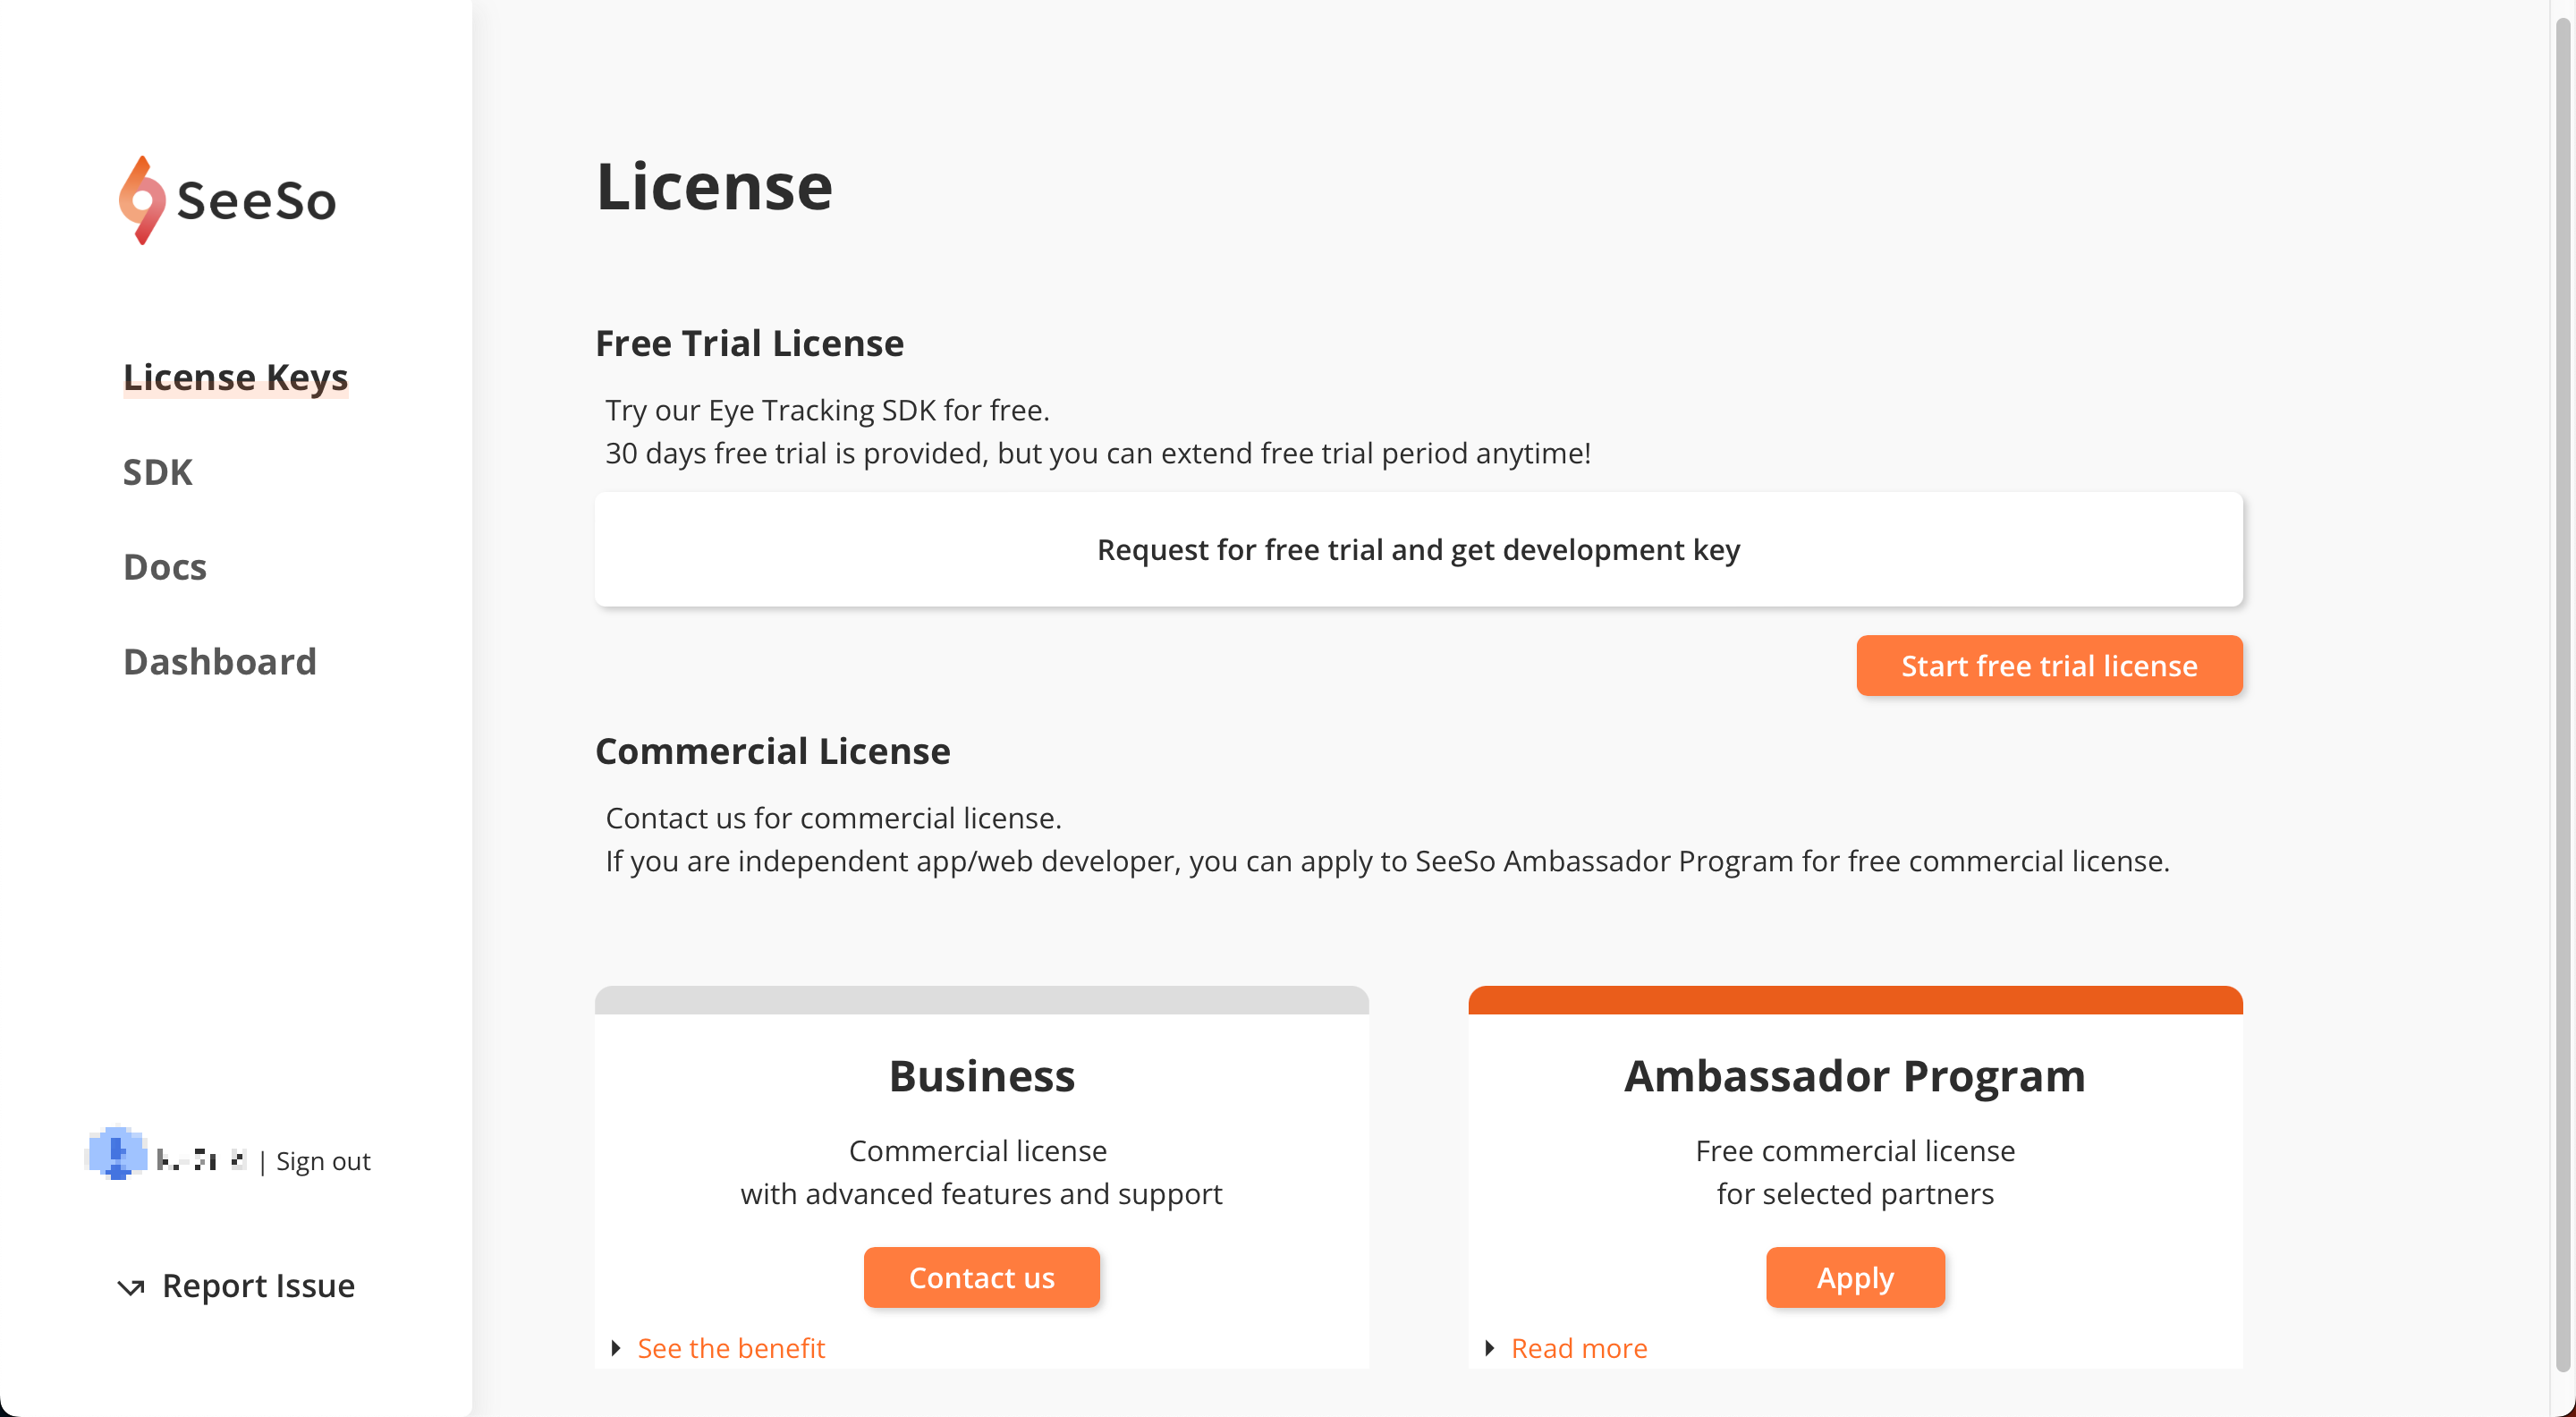
다시 SeeSo Console로 돌아가 License Keys 메뉴로 이동하자.
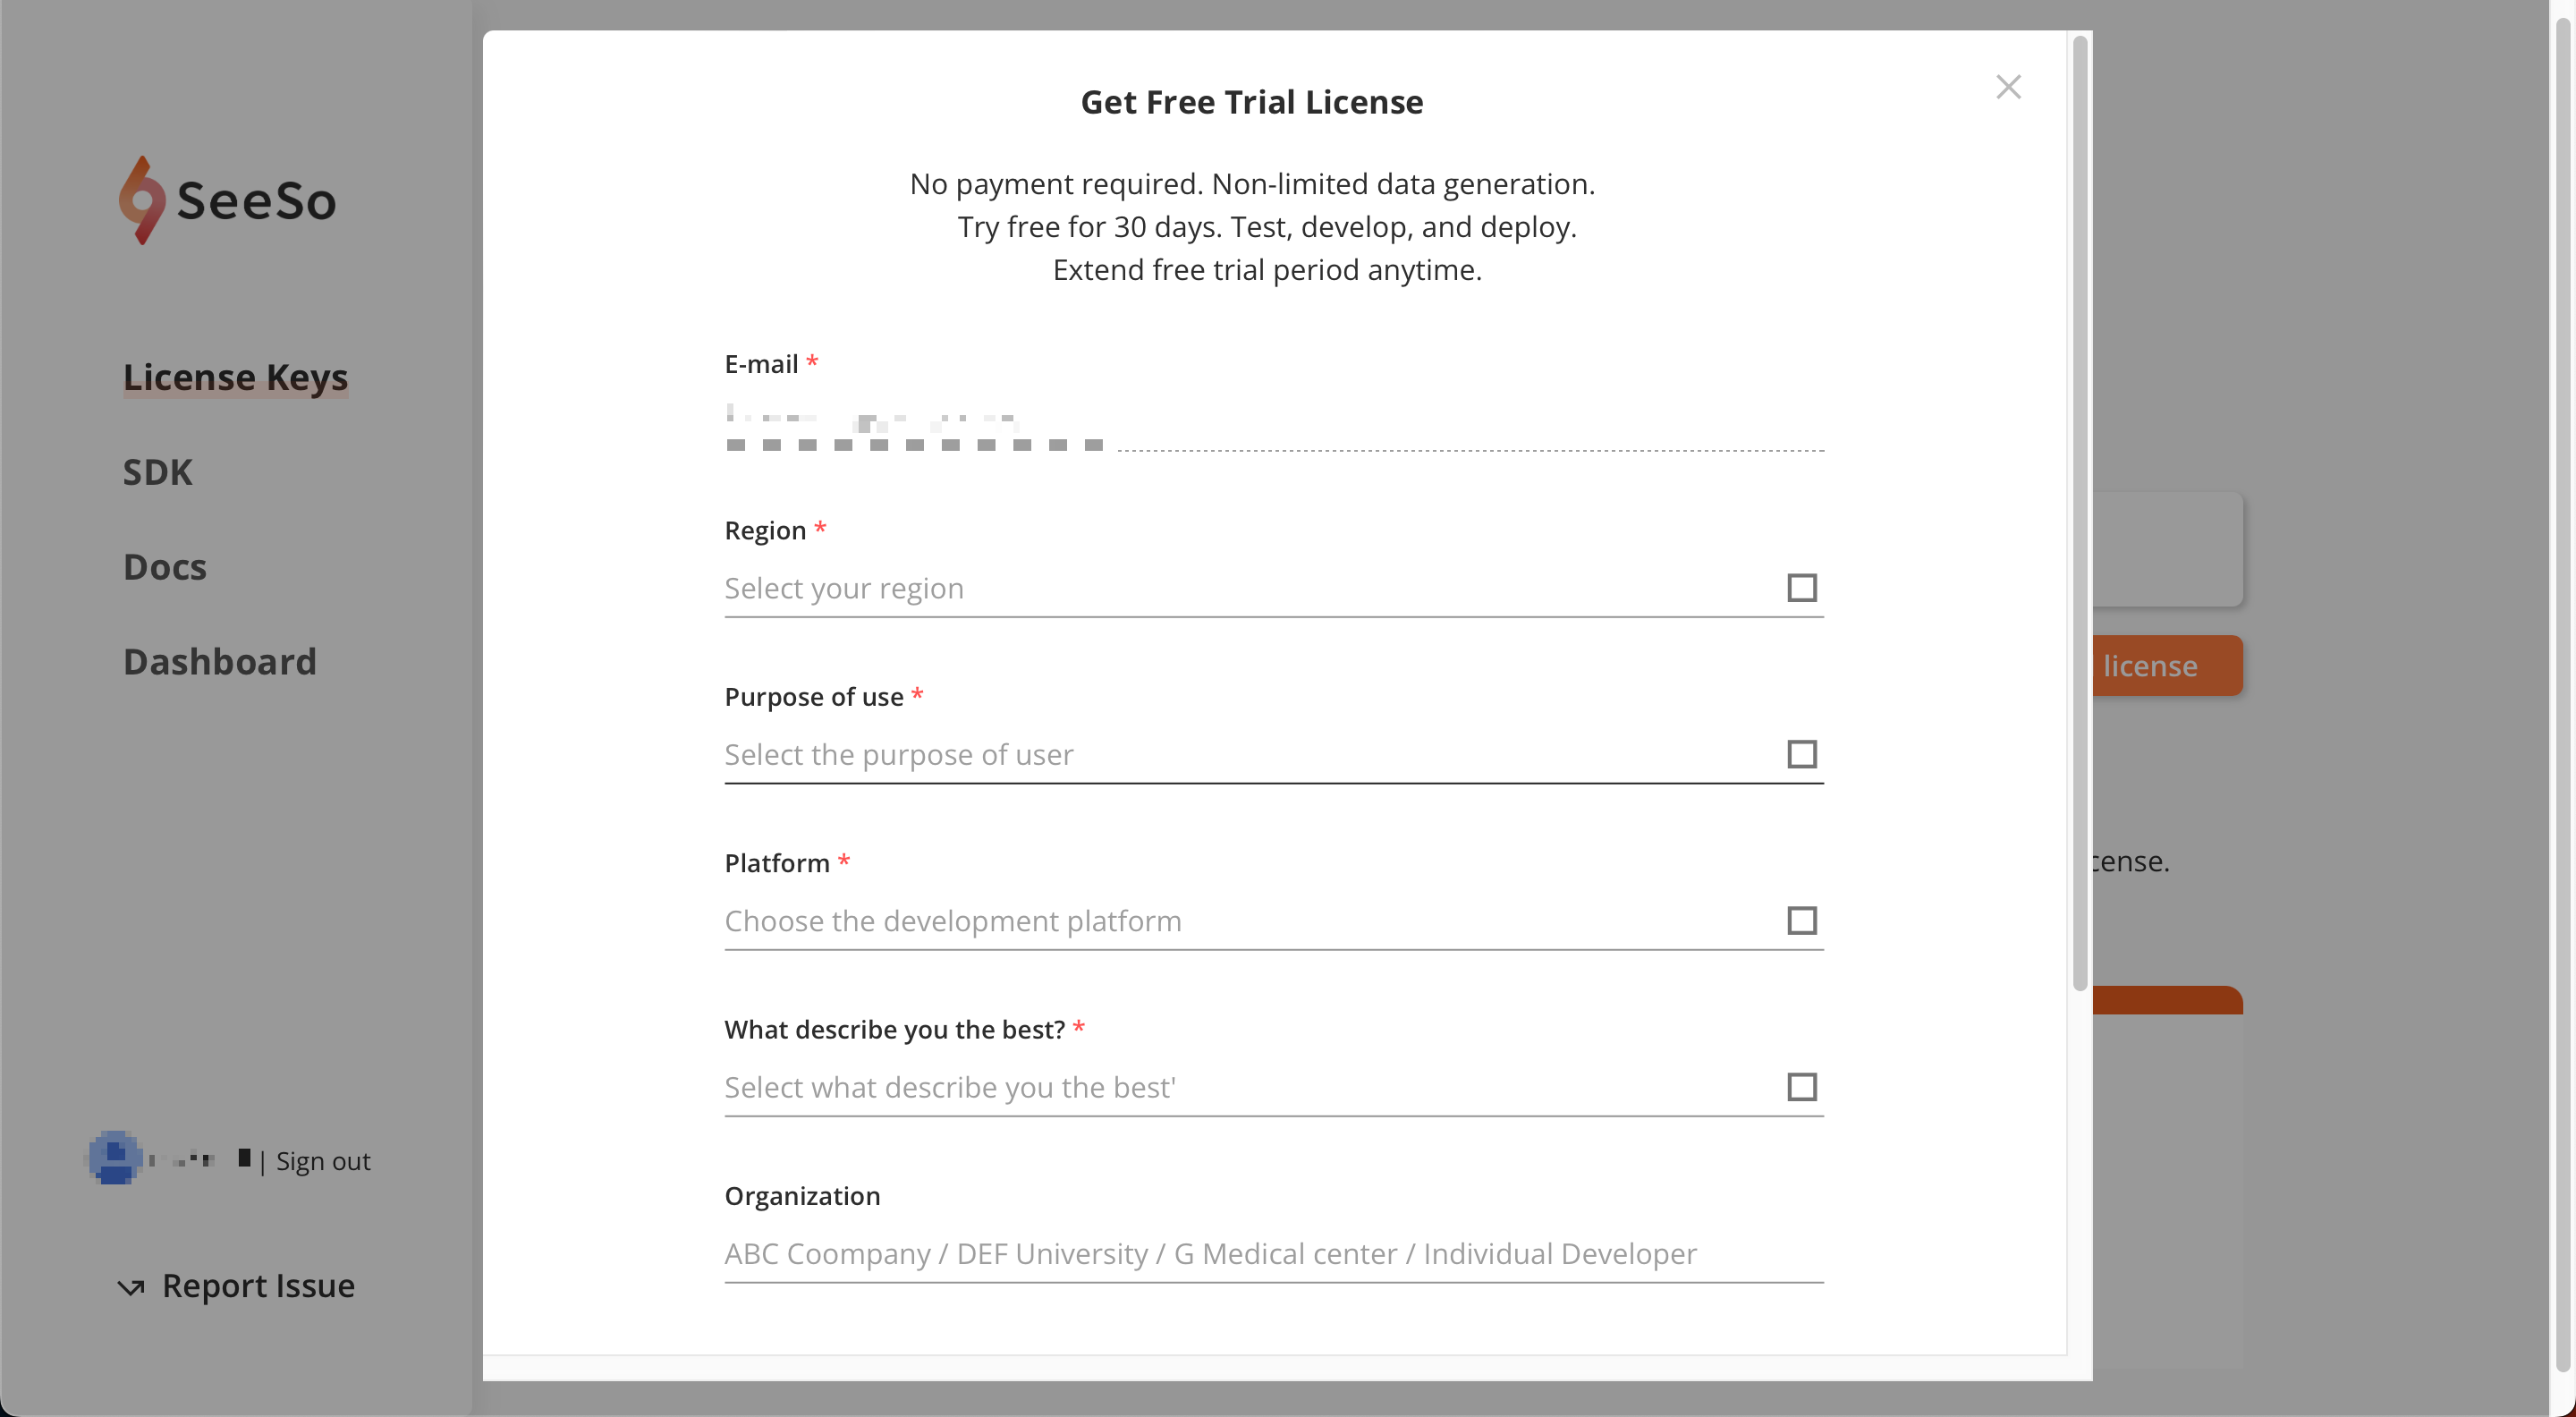
[Start free trial license] 버튼을 눌러 30일간 사용 가능한 개발용 라이센스 키를 발급받을 수 있다.
적혀있는 것처럼 무료 체험 기간을 언제든지 연장할 수 있다고 한다.
아래 정보 입력 후 [Submit and issue development key] 클릭
그러면 이렇게 라이센스 키가 발급되어 있다.
이 키를 복사해두자.

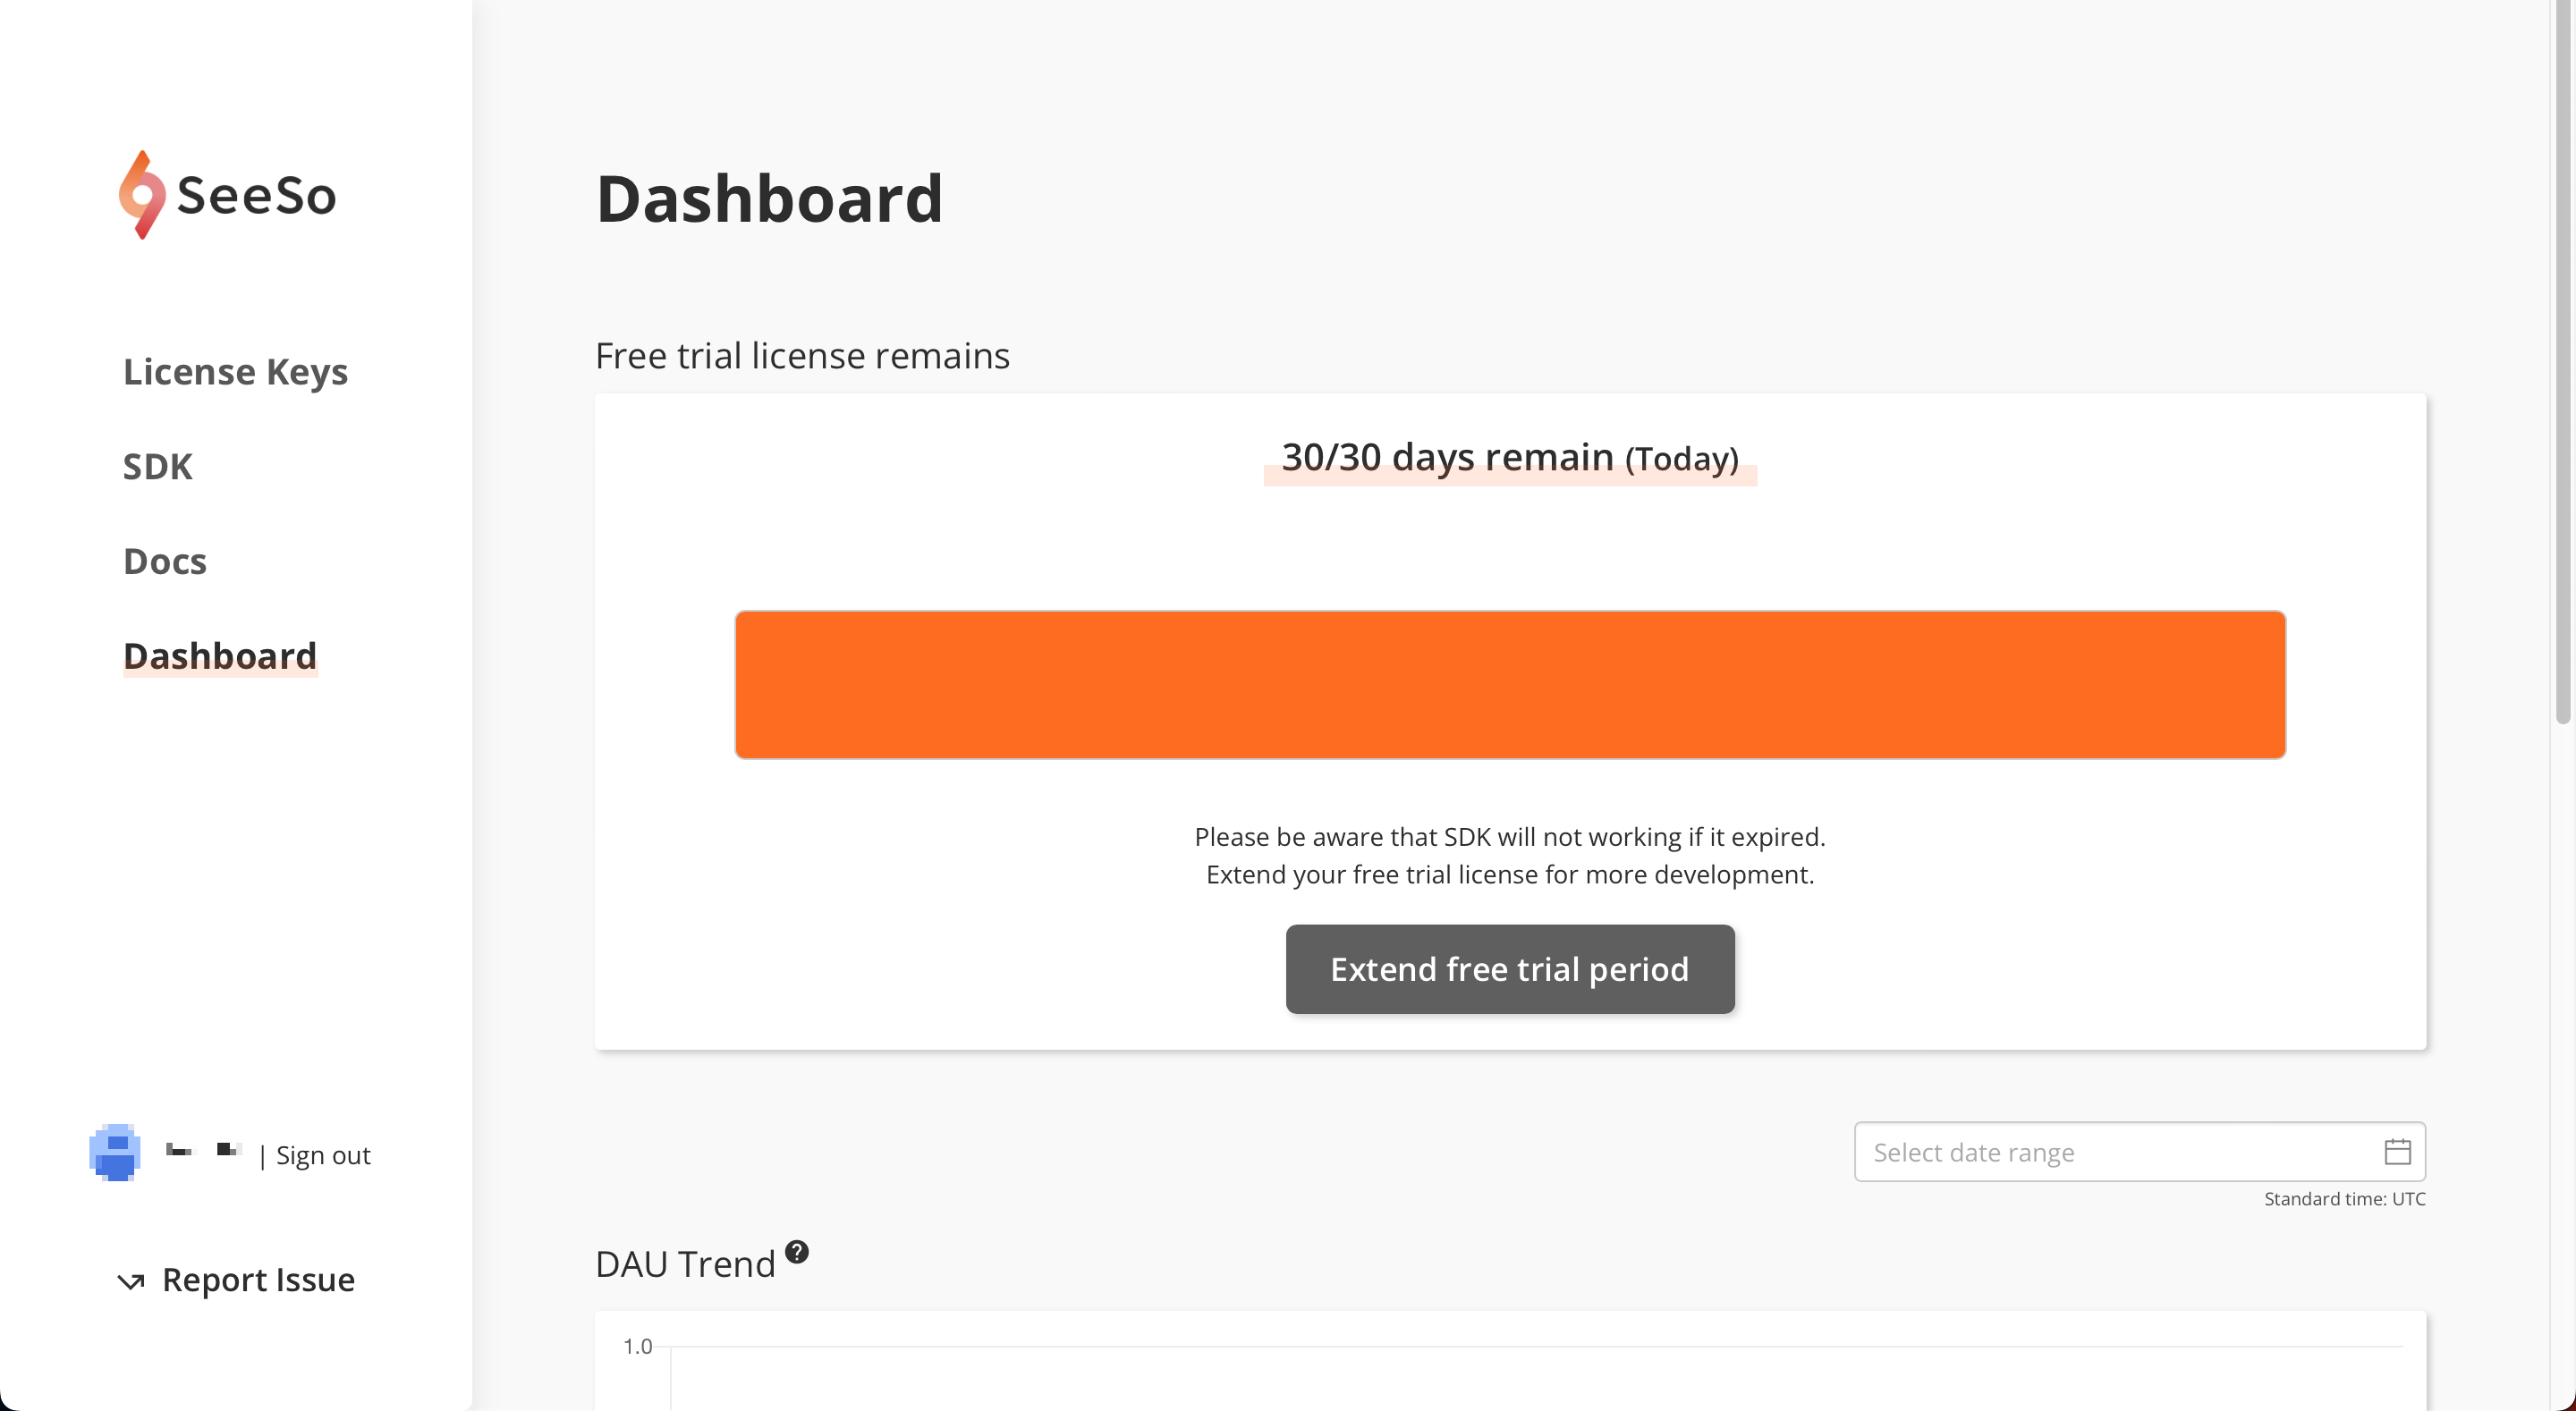
Dashboard 메뉴로 이동하면 이렇게 남은 라이센스 기한을 확인할 수 있다.
2-3. 카메라 권한 설정
이제 다시 프로젝트로 돌아오자.
SeeSo SDK를 사용하려면 기본적으로 카메라 권한 설정이 필요하다.
[TARGETS > Info]로 가서
[+] 버튼을 누르고 Privacy - Camera Usage Description을 추가한다.

2-4. GazeTracker 생성: InitializationDelegate 구현
SeeSo에서 시선 추적 데이터 생성은 GazeTracker 클래스가 담당한다.
즉, GazeTracker 인스턴스가 있어야 시선 추적을 할 수 있다.
이번 단계에서는 GazeTracker를 생성해보자.
@objc public class GazeTracker: NSObject
그전에, 당연히 SeeSo를 사용하려면 해당 프레임워크를 import 해주어야 한다.
ViewController로 이동하여 아래 두 개의 프레임워크를 import 한다.
AVFoundation은 카메라 권한 체크를 위해 필요하다.
import SeeSo
import AVFoundation
그리고 ViewController에 다음과 같이 GazeTracker 프로퍼티를 선언해준다.
var tracker: GazeTracker? = nil
GazeTracker를 생성하기 전에 이니셜 라이즈 방식부터 살펴보자.
GazeTracker를 인스턴스를 생성하는 함수는 다음과 같다.
license에는 아까 발급받은 라이선스 키 문자열을 넣어주면 되고,
delegate에 InitializationDelegate를 전달해주어야 한다.
option에서는 눈 깜빡임도 감지 등의 시선 추적 추가 옵션을 지정할 수 있다.
@objc public static func initGazeTracker(license: String, delegate InitailizationDelegate, option: UserStatusOption? = nil)
그런데 option과 달리 delgate는 옵셔널 타입이 아니다.
GazeTracker 인스턴스를 만들기 위해서는 InitializationDelegate가 꼭 필요하다는 말이다.
그럼 대체 InitializationDelegate가 뭘까?
개발 문서에는 다음과 같이 설명되어 있다.
InitializationDelgate
Gaze Tracker를 만들 때 결과를 알리는 델리게이트 인터페이스
@objc public protocol InitailizationDelegate: GazeTrackerDelegate
initGazeTracker(license:delegate:option:) 함수를 보면 리턴 타입이 Void이다.
그러니까 생성된 객체를 리턴해주지 않는다.
그럼 생성된 GazeTracker에는 어떻게 접근할까?
바로 InitializationDelegate를 통해 생성된 인스턴스를 전달받을 수 있다.
InitializationDelegate 프로토콜을 채택하는 타입은 onInitialized(tracker:error:) 함수를 구현해주어야 하는데,
여기 tracker 파라미터에 담겨서 오게 된다.
onInitialized(tracker:error:)
GazeTracker.init 함수가 호출될 때 호출되는 콜백 함수.
성공하면 생성된 객체를 반환하지만 실패하면 nil을 반환한다.
@objc public func onInitialized(tracker: GazeTracker?, error: InitializationError)
InitializationDelgate가 필요하다는 걸 알았으니 이제 델리게이트를 만들어주자.
ViewController에 InitializationDelegate를 채택하고 onInitialized 함수를 구현한다.
extension ViewController: InitializationDelegate {
    func onInitialized(tracker: GazeTracker?, error: InitializationError) {
        if (tracker != nil) {
            self.tracker = tracker
            print("DEBUG: initialized gaze tracker")
        } else {
            print("ERROR: failed to initialize gaze tracker \(error.description)")
        }
    }
}
그리고 ViewController에 GazeTracker를 호출하는 다음과 같은 함수를 구현한다.
"라이선스키"에는 아까 발급받은 라이선스 키를 넣어준다.
private func initializeGazeTracker() {
    GazeTracker.initGazeTracker(license: "라이센스키", delegate: self)
}
SeeSo는 디바이스 전면 카메라를 사용하는 시선 추적 SDK라고 했다.
GazeTracker를 생성하기 전에, 카메라 권한이 허용되어있는지 확인이 필요하다.
아래와 같이 카메라 권한이 설정된 경우에만 GazeTracker를 생성하도록 하는 메소드를 ViewController에 추가한다.
권한이 허용되지 않았을 경우, 권한을 요청하도록 하고 있다.
private func startEyeTracking() {
    if AVCaptureDevice.authorizationStatus(for: .video) == .authorized {
        self.initializeGazeTracker()
    } else {
        AVCaptureDevice.requestAccess(for: .video) { response in
            if response {
                self.initializeGazeTracker()
            }
        }
    }
}
이제 드디어 GazeTracker를 생성해보자.
viewDidLoad()에서 startEyeTracking()을 호출한다.
이때 백그라운드 스레드에서 실행하여 메인 스레드에 부하가 없도록 하였다.
override func viewDidLoad() {
    super.viewDidLoad()
    DispatchQueue.global().async {
        self.startEyeTracking()
    }
}
잘 구현됐는지 실행해보자.
앱을 실행하면 이제 이렇게 카메라 권한 허용을 요청하는 얼럿이 잘 뜬다.

GazeTracker가 잘 생성됐는지는 화면만 보고서는 알 수 없다.
콘솔 창을 확인해보자.
마지막 출력을 보면 Gaze Tracker가 잘 이니셜 라이즈 되었다는 디버그 프린트를 확인할 수 있다.

그리고 콘솔에 TensorFlow 관련 디버그 프린트들이 보인다.
인공지능 기반으로 구현했다더니 TensorFlow Lite를 사용했나 보다.
2-5. 트래킹 시작: StatusDelegate 구현
GazeTracker가 생성되었으니 이제 Tracking을 진행하자.
트래킹을 시작하는 메소드는 GazeTracker의 startTracking()이다.
startTracking()
성공하면 StatusDelegate 객체의 onStarted() 함수를 호출한다.
StatusDelegate라는 것이 등장하는데,
Status라고 하니 GazeTracker를 트래킹 상태를 알려주는 델리게이트 같다.
StatusDelegate
Gaze Tracker가 작동하는지 여부를 알려주는 프로토콜
역시 맞았다.
그리고 이 프로토콜을 채택하는 타입은 아래 onStarted()와 onStopped(error:) 두 함수를 구현해야 한다.
onStarted()
GazeTracker.StartTracking에 성공하면 자동으로 호출되는 함수
onStopped(error:)
트래킹이 중지되면 호출되는 함수
이제 대충 GazeTracker의 작동 방식에 대해서 감을 잡았을 것이다.
GazeTracker는 대부분 델리게이트를 통해 사용하도록 되어있다.
다시 개발로 돌아와서,
ViewController에 StatusDelegate를 채택해주자.
extension ViewController: StatusDelegate {
    func onStarted() {
        print("DEBUG: Tracker starts tracking")
    }

    func onStopped(error: StatusError) {
        print("ERROR: Tracking is stopped - \(error.description)")
    }
}
그리고 아까 구현한 onInitialized(tracker:error:) 함수에서 statusDelegate를 설정하고 startTracking()을 추가한다.
extension ViewController: InitializationDelegate {
    func onInitialized(tracker: GazeTracker?, error: InitializationError) {
        if (tracker != nil) {
            self.tracker = tracker
            print("DEBUG: initialized gaze tracker")
            self.tracker?.statusDelegate = self	// 추가
            self.tracker?.startTracking()	// 추가
        } else {
            print("ERROR: failed to initialize gaze tracker \(error.description)")
        }
    }
}
이제 실행해보자. 그럼 바로 이런 경고를 받게 된다.
"[AVCaptureSession startRunning] should be called from background thread. Calling it on the main thread can lead to UI unresponsiveness"
AVCaptureSession을 메인 스레드에서 돌리면 UI에 문제가 생길 수 있다는 경고이다.
아까처럼 백그라운드 스레드로 돌려주자.
extension ViewController: InitializationDelegate {
    func onInitialized(tracker: GazeTracker?, error: InitializationError) {
        if (tracker != nil) {
            self.tracker = tracker
            print("DEBUG: initialized gaze tracker")
            self.tracker?.statusDelegate = self
            DispatchQueue.global().async {
                self.tracker?.startTracking()
            }
        } else {
            print("ERROR: failed to initialize gaze tracker \(error.description)")
        }
    }
}
다시 실행하고 콘솔 창을 확인해보자.
GazeTracker 이니셜라이즈 이후에 트래킹이 잘 시작되었음을 확인할 수 있다.

2-6. 시선 데이터 확인: GazeDelegate 구현
트래커가 트래킹 중이라는데, 트래킹 결과는 어디에서 확인할까?
트래킹 결과, 즉 시선 데이터는 GazeDelegate의 onGaze(gazeInfo:)를 통해 확인할 수 있다.
GazeDelegate
프레임별 GazeInfo를 수신하는 프로토콜.
@objc public func onGaze(gazeInfo : GazeInfo)
여기서 GazeInfo는 시선 데이터를 묶은 타입이라고 생각하면 된다.
GazeInfo
시선 추적에 대한 정보로 구성된 클래스
GazeInfo의 프로퍼티로는 timestamp, x, y, trackingState, eyeMovementState, screenState가 있다.
각 프로퍼티에 담기는 값은 프로퍼티 이름 그대로라 설명은 생략한다.
ViewController에 GazeDelegate를 채택하고, onGaze(gazeInfo:)를 구현하자.
extension ViewController: GazeDelegate {
    func onGaze(gazeInfo : GazeInfo) {
        print("timestamp : \(gazeInfo.timestamp), (x , y) : (\(gazeInfo.x), \(gazeInfo.y)) , state : \(gazeInfo.trackingState.description)")
    }
}
그리고 onInitialized(tracker:error:)에서 GazeDelegate를 지정해주자.
extension ViewController: InitializationDelegate {
    func onInitialized(tracker: GazeTracker?, error: InitializationError) {
        if (tracker != nil) {
            self.tracker = tracker
            print("DEBUG: initialized gaze tracker")
            self.tracker?.statusDelegate = self
            self.tracker?.gazeDelegate = self	// 추가
            DispatchQueue.global().async {
                self.tracker?.startTracking()
            }
        } else {
            print("ERROR: failed to initialize gaze tracker \(error.description)")
        }
    }
}
그리고 실행해보면 콘솔 창에 타임스탬프, 좌표, 트래킹 상태가 잘 출력된다.
얼굴이 잘 보일 때는 이렇게 state가 SUCCESS로, 시선 좌표가 잘 출력되고

카메라에서 얼굴을 치우면, state가 이렇게 FACE_MISSING이 되고, 시선 좌표가 (nan, nan)으로 나오게 된다.

이때 좌표계는 화면의 왼쪽 상단이 (0, 0)인 Top Left 좌표계이다.
뷰 좌표계와 동일하다.
2-7. GazePointView 추가
근데 이렇게 수치로만 보면 내가 보고 있는 곳의 좌표가 잘 찍히고 있는 것인지 알 수가 없다.
해당 좌표에 뷰를 표시해서 확인해보자.
반투명한 이미지 뷰를 추가해주었다.
이미지는 시스템 이미지 "circle.fill"을 사용했다.
이때 playerView가 아니라 view에 추가해주었는데,
위에서 말한 것처럼 좌표가 전체 화면을 기준으로 측정되기 때문에 전체 화면에 해당하는 view에 추가해주었다.

ViewController에 IBOutlet을 추가해준다.
@IBOutlet weak var gazePointView: UIImageView!
그리고 이제 onGaze(gazeInfo:)에서 GazeInfo를 사용해 뷰의 위치를 시선 좌표로 옮겨주기 전에,
서브 뷰 hidden 해주는 작업이 앞으로 많이 나올 예정이므로 ViewController에 아래 두 함수를 구현해두자.
private func hideSubview(_ subview: UIView) {
    DispatchQueue.main.async {
        subview.isHidden = true
    }
}

private func showSubview(_ subview: UIView) {
    DispatchQueue.main.async {
        subview.isHidden = false
    }
}
이제 진짜 onGaze(gazeInfo:)에서 GazeInfo를 사용해 뷰의 위치를 시선 좌표로 옮겨주자.
extension ViewController: GazeDelegate {
    func onGaze(gazeInfo : GazeInfo) {
        print("timestamp : \(gazeInfo.timestamp), (x , y) : (\(gazeInfo.x), \(gazeInfo.y)) , state : \(gazeInfo.trackingState.description)")
        DispatchQueue.main.async {
            if gazeInfo.trackingState == .SUCCESS {
                self.gazePointView.center = CGPoint(x: gazeInfo.x, y: gazeInfo.y)
                self.showSubview(self.gazePointView)
            } else {
                self.hideSubview(self.gazePointView)
            }
        }
    }
}
그리고 실행해보면 하얀색 원이 시선을 따라 이동한다.
근데 어쩐지 미묘하게 잘 안 맞는다.
이 문제는 다음 단계에서 해결해줄 것이다.

2-8. 캘리브레이션 추가
미묘하게 시선 좌표가 잘 안 맞았던 이유는 Calibration을 안 해줬기 때문이다.
이번 단계에서는 캘리브레이션을 추가하여 정확도를 높여보자.
Calibration이란 표준과 비교하여 측정값을 보정하는 것을 말한다.
영점 조절이라고 생각하면 된다. Calibration을 하고 나면 더 정확해진다.
시선 추적의 캘리브레이션은 정해진 몇 개의 좌표들을 보게 한 뒤 샘플 데이터를 측정하여 보정하는 방식으로 진행된다.
먼저 캘리브레이션에 사용할 CalibrationPointView를 만들어주자.
캘리브레이션 포인트에 이 뷰를 표시하고, 캘리브레이션 진행도를 라벨에 표시해 줄 것이다.
뷰는 SeeSo에서 제공하는 샘플 프로젝트의 CalibraitonPointView.swift를 그대로 사용하였다.
class CalibrationPointView : UILabel {
    override init(frame: CGRect) {
        super.init(frame : frame)
        layer.cornerRadius = frame.width/2
        layer.borderColor = UIColor.label.cgColor
        layer.borderWidth = 2
        textAlignment = .center
        textColor = .label
        adjustsFontSizeToFitWidth = true
        text = "0%"
    }

    func setProgress(progress : Double){
        let percent = Int(progress * 100)
        DispatchQueue.main.async {
            self.text = "\(percent)%"
        }
    }

    required init?(coder: NSCoder) {
        fatalError("init(coder:) has not been implemented")
    }


}
그리고 ViewController에 해당 뷰를 프로퍼티로 추가해주고,
(위치는 일단 안 보이게 하기 위해 마이너스 값을 주었다.)
private lazy var caliPointView = CalibrationPointView(frame: CGRect(x: 0, y: -40, width: 40, height: 40))
viewDidLoad() 시점에 서브 뷰로 추가해준다.
캘리브레이션을 해야 하므로 playerView와 gazePointView는 잠시 숨겨둔다.
private func configureSubviews() {
    self.hideSubview(self.playerView)
    self.hideSubview(self.gazePointView)
    self.view.addSubview(self.caliPointView)
}
override func viewDidLoad() {
super.viewDidLoad()
self.configureSubviews() // 추가
self.loadVideo(with: "M7lc1UVf-VE")
DispatchQueue.global().async {
self.startEyeTracking()
}
}
이제 캘리브레이션을 구현해야 한다.
캘리브레이션 역시 델리게이트를 이용한다.
공식 문서 먼저 확인해보고 가자.
CalibrationDelegate
캘리브레이션 프로세스에서 사용되는 프로토콜
@objc public protocol CalibrationDelegate: GazeTrackerDelegate
이 CalibrationDelegate를 채택하는 타입은 아래 세 가지 함수를 구현해야 한다.
onCalibrationNextPoint
교정 과정에서 초점을 맞춰야 하는 시선점의 x, y 좌표 값을 전달해주는 함수
@objc public func onCalibrationNextPoint(x: Double, y: Double)onCalibrationProgress
현재 포인트에서의 캘리브레이션 진행률을 전달해주는 함수. 0.0 ~ 1.0 사이 값이다.
@objc public func onCalibrationProgress(progress: Double)onCalibrationFinished
캘리브레이션 종료를 알리는 콜백.
이 콜백 이후로는 GazeDelegate가 보정된 시선 데이터를 준다.
매개 변수로 전달된 캘리브레이션 데이터는 저장해두었다가 사용하는 데 활용할 수 있다.
@objc public func onCalibrationFinished(calibrationData: [Double])
이제 ViewController로 가서 CalibrationDelegate를 채택해주자.
이때 중요한 것은 onCalibrationNextPoint(x:y:)에서 GazeTracker의 startCollectSamples()를 호출해주는 것이다.
이것을 호출해주어야 다음 포인트에 대해 캘리브레이션이 계속된다.
extension ViewController : CalibrationDelegate {
    func onCalibrationProgress(progress: Double) {
        caliPointView.setProgress(progress: progress)
    }

    func onCalibrationNextPoint(x: Double, y: Double) {
        DispatchQueue.main.async {
            self.caliPointView.center = CGPoint(x: x, y: y)
        }

        DispatchQueue.main.asyncAfter(deadline: .now() + 1, execute: {
            if let result = self.tracker?.startCollectSamples() {
                print("DEBUG: startCollectSamples : \(result)")
            }
        })
    }

    func onCalibrationFinished(calibrationData : [Double]) {
        print("DEBUG: Calibration finished")
        self.tracker?.stopCalibration()
        self.hideSubview(self.caliPointView)

        self.showSubview(self.playerView)
        self.playerView.playVideo()
    }
}
startCollectSamples()는 무슨 메소드일까?
StartCollectSamples
CalibrationDelegate.onCalibrationNextPoint 함수에서 캘리브레이션이 진행 중일 때 봐야 할 점의 좌표를 전달한다.
따라서 다음 점에 대해 캘리브레이션을 계속하려면 startCollectSamples()를 호출해주어야 하는 것이다.
이제 구현한 CalibrationDelegate를 onInitialized(tracker:error:)로 가서 설정해주자.
func onInitialized(tracker: GazeTracker?, error: InitializationError) {
    if (tracker != nil) {
        self.tracker = tracker
        print("DEBUG: initialized gaze tracker")
        self.tracker?.statusDelegate = self
        self.tracker?.gazeDelegate = self
        self.tracker?.calibrationDelegate = self	// 추가
        DispatchQueue.global().async {
            self.tracker?.startTracking()
        }
    } else {
        print("ERROR: failed to initialize gaze tracker \(error.description)")
    }
}
근데 델리게이트 설정 코드가 점점 길어져서 보기 불편하다.
이럴 땐 아래와 같이 setDelegates 함수 하나로 여러 델리게이트를 한 번에 설정할 수 있다.
extension ViewController: InitializationDelegate {
    func onInitialized(tracker: GazeTracker?, error: InitializationError) {
        if (tracker != nil) {
            self.tracker = tracker
            print("DEBUG: initialized gaze tracker")
            self.tracker?.setDelegates(statusDelegate: self,
                                       gazeDelegate: self,
                                       calibrationDelegate: self,
                                       imageDelegate: nil)

            DispatchQueue.global().async {
                self.tracker?.startTracking()
            }
        } else {
            print("ERROR: failed to initialize gaze tracker \(error.description)")
        }
    }
}
델리게이트 설정을 마쳤으므로 이제 캘리브레이션을 시작해주자.
캘리브레이션 시작과 종료는 GazeTrakcer의 startCalibration(mode:criteria:)와 stopCalibration()을 사용한다.
공식 문서를 살펴보고 가자.
startCalibration
캘리브레이션을 시작하는 함수.
모든 파라미터가 유효한 경우 true를 리턴하고, 이외의 경우 false를 리턴한다.
@objc public func startCalibration(mode: CalibrationMode?, criteria : AccuracyCriteria?, region: CGRect?) → Bool매개변수가 총 3개 있는데 각각을 살펴보자.
mode
캘리브레이션을 몇 개의 점에 대해서 진행할 것인지를 나타낸다.
DEFAULT(0), ONE_POINT(1), FIVE_POINT(5), SIX_POINT(6)의 세 가지 옵션을 사용할 수 있다.
디폴트는 FIVE_POINT이다.
region
캘리브레이션이 필요한 영역. 단위는 pt이다.
criteria
정확도를 관리하는 옵션.
DEFAULT(0), LOW(1), HIGH(2)의 세 가지 옵션을 사용할 수 있다.
디폴트는 DEFAULT이다.
stopCalibration
캘리브레이션을 중지한다.
@objc public func stopCalibration()
이제 이 두 메소드를 사용해서 캘리브레이션을 시작하고 마치는 두 함수를 ViewController에 구현해주자.
캘리브레이션 mode는 ONE_POINT, criteria은 DEFAULT로 주었다.
만약 정확도가 떨어진다고 생각되면 더 많은 포인트를 사용하는 모드로 변경하거나 criteria를 high로 조정해보면 된다.
extension ViewController {
    private func startCalibration() {
        let result = self.tracker?.startCalibration(mode: .ONE_POINT, criteria: .DEFAULT)
        if let isStart = result,
           !isStart {
            print("ERROR: Calibration start failed")
        } else {
            print("DEBUG: Calibration start success")
        }
    }

    private func stopCalibration(){
        self.tracker?.stopCalibration()
        self.hideSubview(self.caliPointView)
    }
}
캘리브레이션은 트래킹이 시작되었을 때 시작해주자.
아이트래킹이 시작 시 호출되는 콜백인 onStarted()에서 startCalibration()을 호출한다.
func onStarted() {
    print("DEBUG: Tracker starts tracking")
    self.startCalibration()	// 추가
}
캘리브레이션 종료되면 캘리브레이션을 중단해야 한다.
캘리브레이션 종료 시 호출되는 콜백인 onCalibrationFinished()에서 stopCalibration()을 호출한다.
사실 아까 구현해두었다. 두 라인을 stopCalibration() 하나로 바꿔주자.
func onCalibrationFinished(calibrationData : [Double]) {
    print("DEBUG: Calibration finished")
    self.stopCalibration()

    self.showSubview(self.playerView)
    self.playerView.playVideo()
}
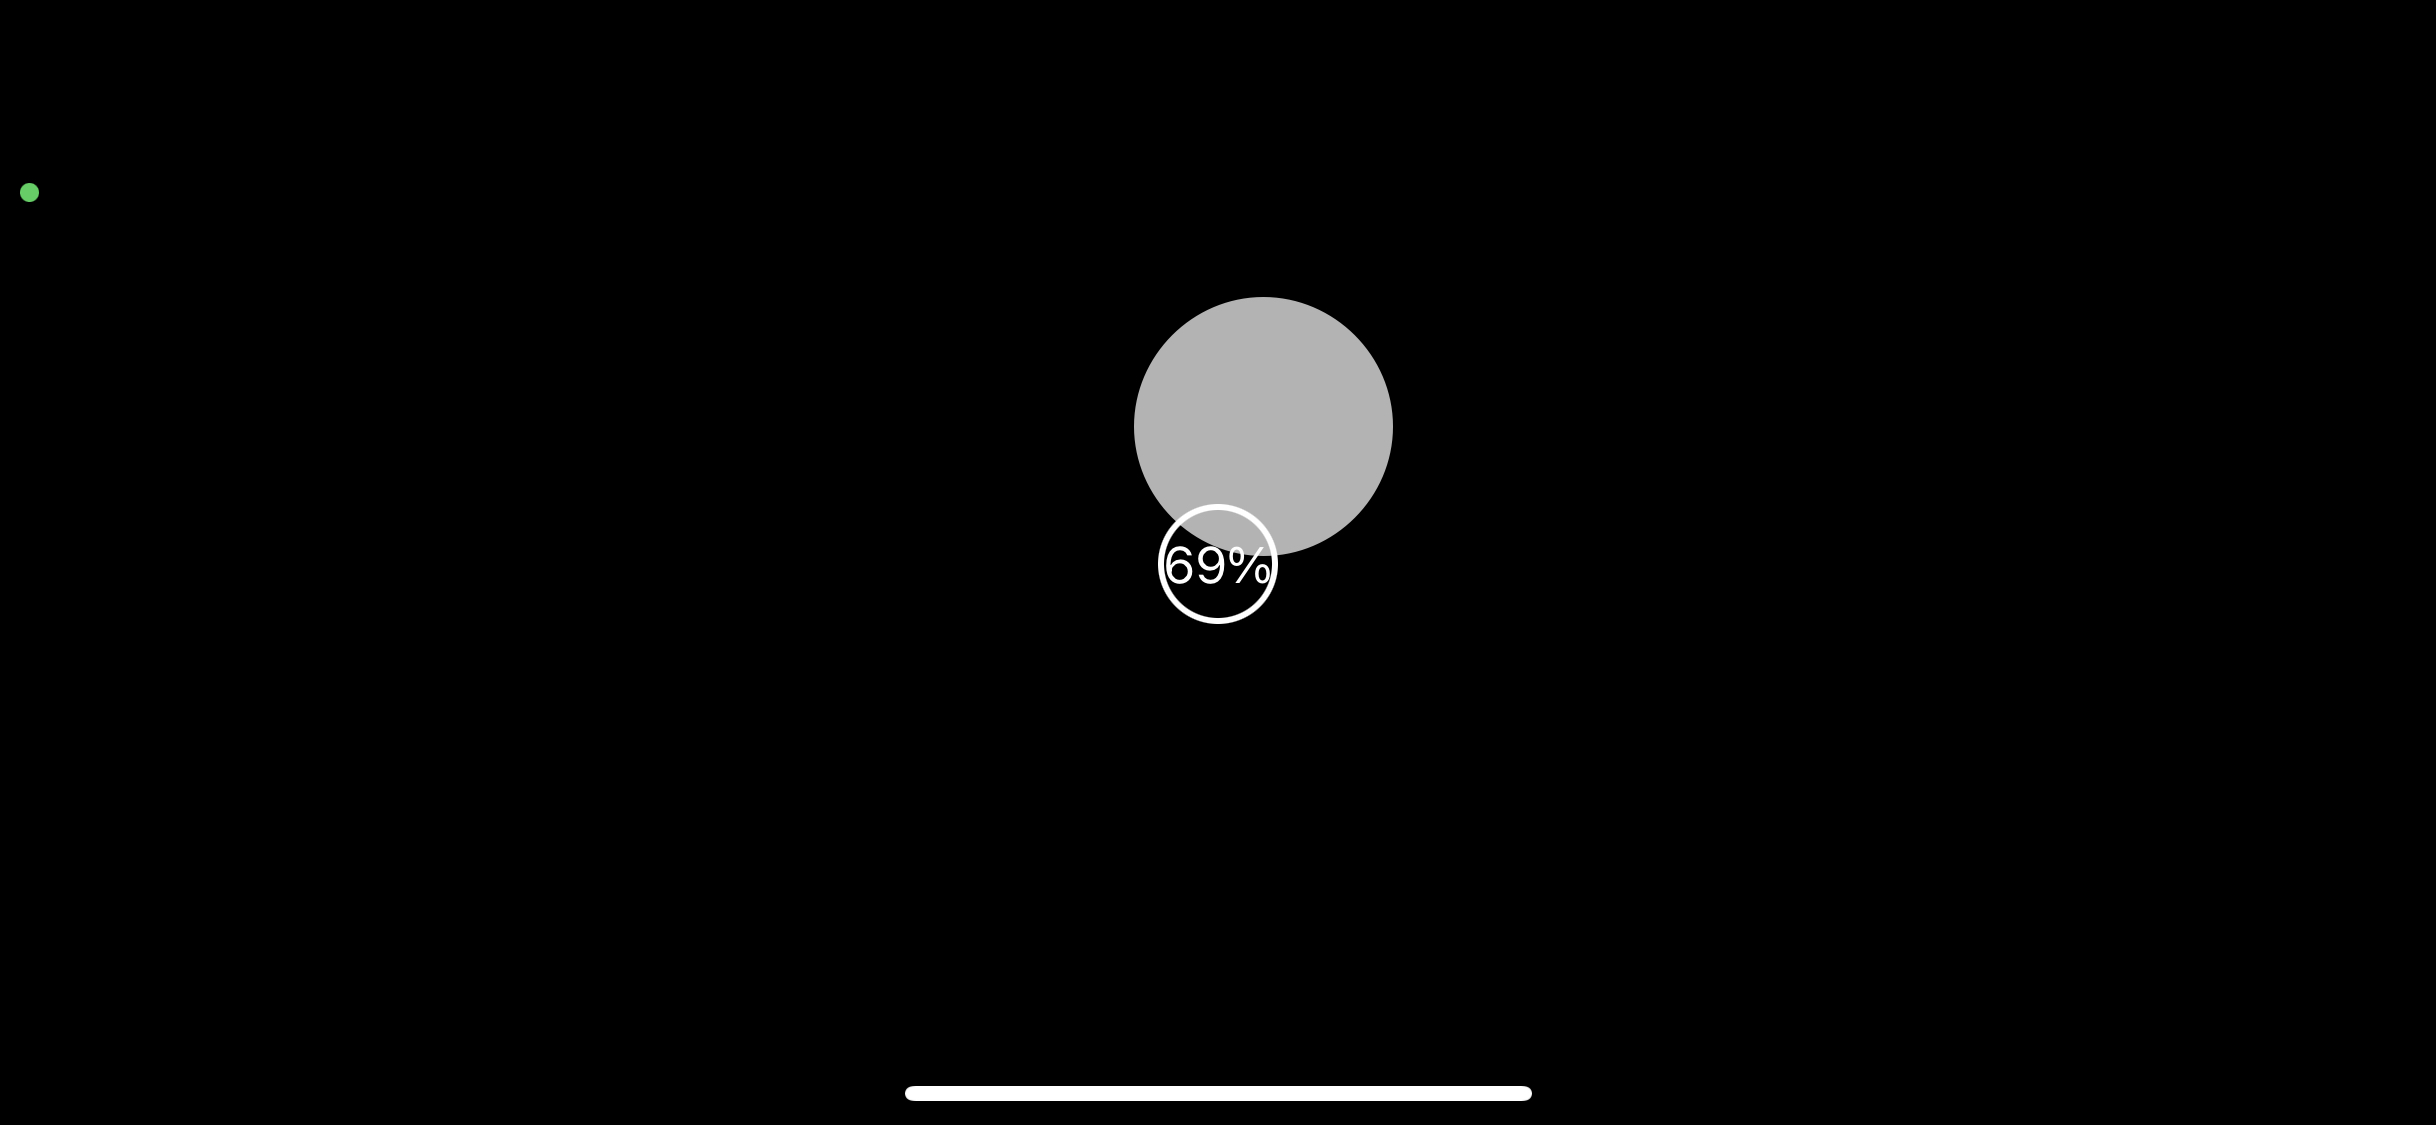
이제 실행해서 테스트해보자.
gazePointView가 100%가 될 때까지 동그라미를 쳐다보고 있으면 캘리브레이션이 된다.
근데 이런, gazePointView를 분명 hidden 처리해줬는데 보인다.
원인은 onGaze(gazeInfo:)에 있다.
캘리브레이션 중에도 아이트래킹 중이므로 onGaze(gazeInfo:)가 계속 불린다.
따라서 캘리브레이션 중에 showSubview가 호출되어 gazePointView가 보이게 된 것이다.
func onGaze(gazeInfo : GazeInfo) {
    print("timestamp : \(gazeInfo.timestamp), (x , y) : (\(gazeInfo.x), \(gazeInfo.y)) , state : \(gazeInfo.trackingState.description)")
    DispatchQueue.main.async {
        if gazeInfo.trackingState == .SUCCESS {
            self.gazePointView.center = CGPoint(x: gazeInfo.x, y: gazeInfo.y)
            self.showSubview(self.gazePointView)	// 여기가 원인 코드!
        } else {
            self.hideSubview(self.gazePointView)
        }
    }
}
다행히 GazeTracker에 캘리브레이션 중인지 여부를 알 수 있는 메소드 isCalibrating()이 존재하므로 이것을 활용하자.
onGaze 처음에 아래와 같은 guard 문을 추가하여 캘리브레이션 중이 아닐 때만 gazePointView를 움직여주면 된다.
guard let isCalibrating = self.tracker?.isCalibrating(),
          !isCalibrating else { return }
다시 실행해보자. 아래 움짤처럼 잘 작동한다.
gazePointView가 사라졌고, 100%가 되면 playerView와 gazePointView가 나타나면서 동영상이 자동 재생된다.
2-9. 비디오 좌표와 시간으로 변환
이제 시선 추적의 진짜 마지막 단계다.
지금까지 구한 것은 시청자가 특정 시각에 화면의 어디를 보고 있는가였다.
그런데 우리가 필요한 것은 특정 영상 재생 시각에 영상의 어디를 보고 있는가이므로
view → playerView로의 좌표 변환과, 비디오의 재생 시각을 알아내는 작업이 필요하다.
먼저 좌표 변환부터 해보자.
현재 GazeInfo가 정의된 좌표계를 나타내면 아래 그림과 같다.
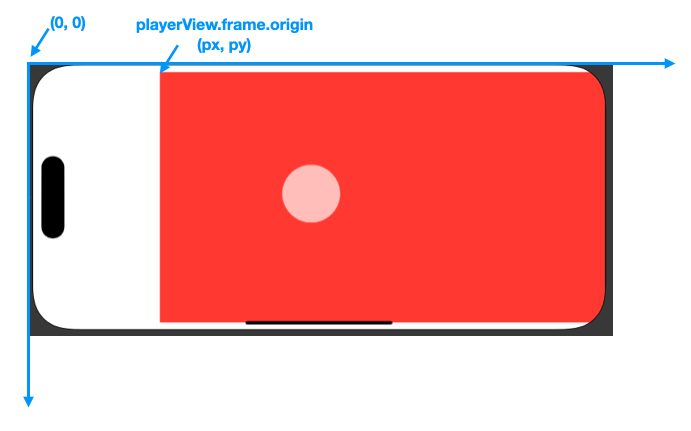
좌표계를 플레이어 뷰를 기준으로 바꿔주면 이렇게 된다.

따라서 비디오 좌표로 변환하는 식은 다음과 같다.
let videoX = gazeInfo.x - self.playerView.frame.origin.x
let videoY = gazeInfo.y - self.playerView.frame.origin.y
변환한 좌표를 출력해서 확인해주자.

그리고 이제 timestamp 대신 비디오 재생 시각을 출력해보자.
Play Time과 Gaze Info를 연결시켜야 한다.
방법은 두 가지가 있다.
1. Gaze Info를 저장해 두고 playerView(_:didPlayTime:)에서 사용한다.
2. Play Time을 저장해두고 onGaze(gazeInfo:)에서 사용한다.
이 중에서 전자를 사용했다.
나중에 표정 분석 결과까지 한 번에 출력해줘야 하기 때문에 playerView(_:didPlayTime:)에서 두 결과를 합쳐주는 것이 편하다.
그러기 위해서 약간의 리팩터링을 거치자.
먼저 GazeInfo + 비디오 좌표를 담는 새로운 구조체 VideoGazeInfo를 만들어준다.
struct VideoGazeInfo {
    private let xInPlayerCoordinate: Double
    private let yInPlayerCoordinate: Double
    private let seesoGazeInfo: GazeInfo

    var x: Double { return self.xInPlayerCoordinate }
    var y: Double { return self.yInPlayerCoordinate }
    var timestamp: Double { return self.seesoGazeInfo.timestamp }
    var trackingState: TrackingState { return self.seesoGazeInfo.trackingState }
    var eyeMovementState: EyeMovementState { return self.seesoGazeInfo.eyeMovementState }
    var screenState: ScreenState { return self.seesoGazeInfo.screenState }

    var positionDescription: String {
        return "(\(String(format: "%.2f", self.x)), \(String(format: "%.2f", self.y)))"
    }

    init?(gazeInfo: GazeInfo?, playerOrigin: CGPoint) {
        guard let gazeInfo = gazeInfo else { return nil }
        self.xInPlayerCoordinate = gazeInfo.x - playerOrigin.x
        self.yInPlayerCoordinate = gazeInfo.y - playerOrigin.y
        self.seesoGazeInfo = gazeInfo
    }
}
그리고 PlayTime + VideoGazeInfo를 담는 상위 구조체 WatchingInfo를 만들어준다.
이제 이 구조체를 사용해서 시청 관련 상태 값들을 저장할 것이다.
import Foundation
import SeeSo

struct WatchingInfo: CustomStringConvertible {
    var playTime: Float = 0
    var gazeInfo: VideoGazeInfo?

    var description: String {
        return """
        --------------------------------------
        | Play Time |
            \(String(format: "%.2d", Int(playTime/60))):\(String(format: "%.2d", Int(playTime)%60)).\(Int(round(playTime*100))%100) sec
        | Gaze Info |
            Poisition           : \(gazeInfo?.positionDescription ?? "None")
            Tracking State      : \(gazeInfo?.trackingState.description ?? "None")
            Eye Movement State  : \(gazeInfo?.eyeMovementState.description ?? "None")
            Screen State        : \(gazeInfo?.screenState.description ?? "None")
        --------------------------------------
        """
    }

    mutating func updateGazeInfo(with gazeInfo: VideoGazeInfo?) {
        self.gazeInfo = gazeInfo
    }

    mutating func updatePlayTime(with playTime: Float) {
        self.playTime = playTime
    }
}
ViewController에 watchingInfo 프로퍼티를 추가해주고
private var watchingInfo = WatchingInfo()
WatchingInfo의 업데이트를 처리해주는 두 함수를 추가로 구현한다.
새로운 Gaze Info를 수신하면 updateWatchingInfo(gazeInfo:)를 호출하고,
새로운 Play Time 정보를 수신하면 updateWatchingInfo(playTime:)을 호출하여 상태 값을 업데이트해준다.
extension ViewController {
    private func updateWatchingInfo(gazeInfo: GazeInfo) {
        let videoGazeInfo = VideoGazeInfo(gazeInfo: gazeInfo, playerOrigin: self.playerView.frame.origin)
        self.watchingInfo.updateGazeInfo(with: videoGazeInfo)

        DispatchQueue.main.async {
            if gazeInfo.trackingState == .SUCCESS {
                self.gazePointView.center = CGPoint(x: gazeInfo.x, y: gazeInfo.y)
                self.showSubview(self.gazePointView)
            } else {
                self.hideSubview(self.gazePointView)
            }
        }
    }

    private func updateWatchingInfo(playTime: Float) {
        self.watchingInfo.updatePlayTime(with: playTime)
    }
}
따라서 onGaze(gazeInfo:)와 playView(_:didPlayTime) 내부를 아래와 같이 변경해준다.
func onGaze(gazeInfo : GazeInfo) {
    guard let isCalibrating = self.tracker?.isCalibrating(),
          !isCalibrating else { return }
    self.updateWatchingInfo(gazeInfo: gazeInfo)
}
func playerView(_ playerView: YTPlayerView, didPlayTime playTime: Float) {
self.updateWatchingInfo(playTime: playTime)
print(self.watchingInfo)
}
이제 실행해보자. 콘솔을 확인해보면
0.5초 간격으로 playerView(_:didPlayTime:)이 호출되고, gazeInfo가 잘 출력된다.

드디어 시선 추적 구현이 끝났다.
이제 다음은 표정 분석이다.
3. 표정 분석
마지막으로 할 일은,
전면 카메라를 이용하여 얼굴을 캡처하고,
Face Detection 인공지능을 사용하여 캡처한 사진에서 얼굴만 크롭 한 뒤,
Face-Expression-Recognition 인공지능을 사용하여 얼굴 크롭 이미지로부터 표정 데이터를 얻어내는 것이다.
표정 분석은 SDK 없이 직접 구현했기 때문에 해줘야 하는 작업이 조금 많다.
전면 카메라를 이용한 얼굴 캡처는 SeeSo에서 사용 중인 카메라 프레임을 가져와서 사용하는 방식으로 구현하였고,
얼굴 크롭 작업은 Vision의 DetectFaceLandmarks를 사용하여 얼굴의 bounding box를 얻은 뒤,
해당 bounding box부분만 잘라내는 방식으로 구현하였다.
마지막으로 FER Core ML 모델을 사용하여 얼굴 크롭 이미지에서 표정을 분류하도록 구현하였다.
세부 구현 단계는 다음과 같다.
- TensorFlow → Core ML 변환
- Predictor 구현
- EmotionInfo 추가
- ImageDelegate 구현
- 얼굴 크롭 구현
- Prediction 수행
- 프리뷰 추가
3-1. TensorFlow → Core ML 변환
아까 SeeSo는 Tensorflow Lite 모델을 사용한 것을 콘솔 창에서 확인할 수 있었는데,
우리는 iOS로 개발하므로 first-party 라이브러리인 Core ML 모델을 사용해보자.
표정 분석 모델은 Facial-Expression-Recognition, 줄여서 FER 모델이라고 하는데,
문제는 Core ML 포맷의 FER 모델이 거의 없다는 것이다.
구글링을 통해 개인 개발자들이 학습시킨 모델 몇 개를 찾긴 했는데,
용량이 매우 크고 심지어 정확도도 별로여서 TensorFlow나 PyTorch 모델을 Core ML 포맷으로 변환하여 사용하기로 하였다.
표정 분석에 사용할 FER 모델은 MiniXception이다.
실시간 classification이 가능한 CNN 모델이다.
영상 시청 내내 표정 분석을 수행해야 하므로 Real-time용으로 설계된 이 모델을 선택하였다.
Real-time Convolutional Neural Networks for Emotion and Gender Classification
In this paper we propose an implement a general convolutional neural network (CNN) building framework for designing real-time CNNs. We validate our models by creating a real-time vision system which accomplishes the tasks of face detection, gender classifi
arxiv.org
아래 깃허브 레포지토리는 TensorFlow로 MiniXception을 구현한 레포지토리이다.
FER-2013 데이터셋으로 학습시킨 pre-trained 모델도 제공하고 있으므로 이것을 사용하자. (정확도는 66%라고 한다.)
GitHub - oarriaga/face_classification: Real-time face detection and emotion/gender classification using fer2013/imdb datasets wi
Real-time face detection and emotion/gender classification using fer2013/imdb datasets with a keras CNN model and openCV. - GitHub - oarriaga/face_classification: Real-time face detection and emoti...
github.com
애플에서 TensorFlow나 Pytorch 같은 third-party 모델을 Core ML 포맷으로 변환해주는 라이브러리인 Core ML Tools를 제공한다.
Core ML Tools를 사용해서 TensorFlow 모델을 Core ML 모델로 변환해보자.
GitHub - apple/coremltools: Core ML tools contain supporting tools for Core ML model conversion, editing, and validation.
Core ML tools contain supporting tools for Core ML model conversion, editing, and validation. - GitHub - apple/coremltools: Core ML tools contain supporting tools for Core ML model conversion, edit...
github.com
TensorFlow, Core ML Tools 설치 등 개발 환경 설정해주어야 하는 것이 많으니 편하게 Google Colab에서 진행하자.
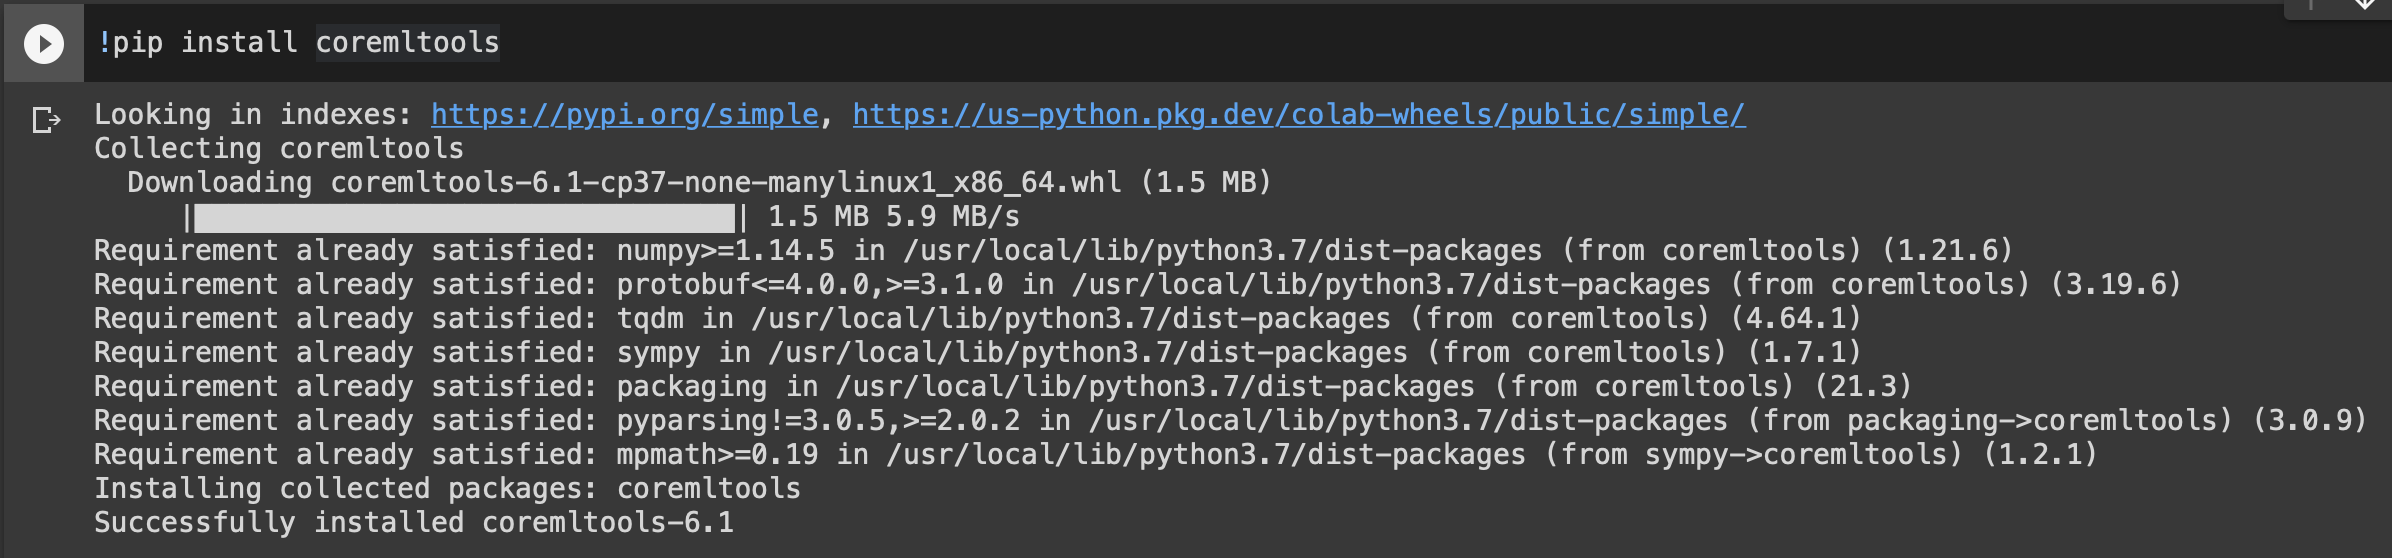
일단 아래 명령어를 사용하여 Core ML Tools부터 설치해주자.
!pip install coremltools6.1 버전이 잘 설치되었다.
이제 pre-trained 모델을 다운로드하여 로드하자.
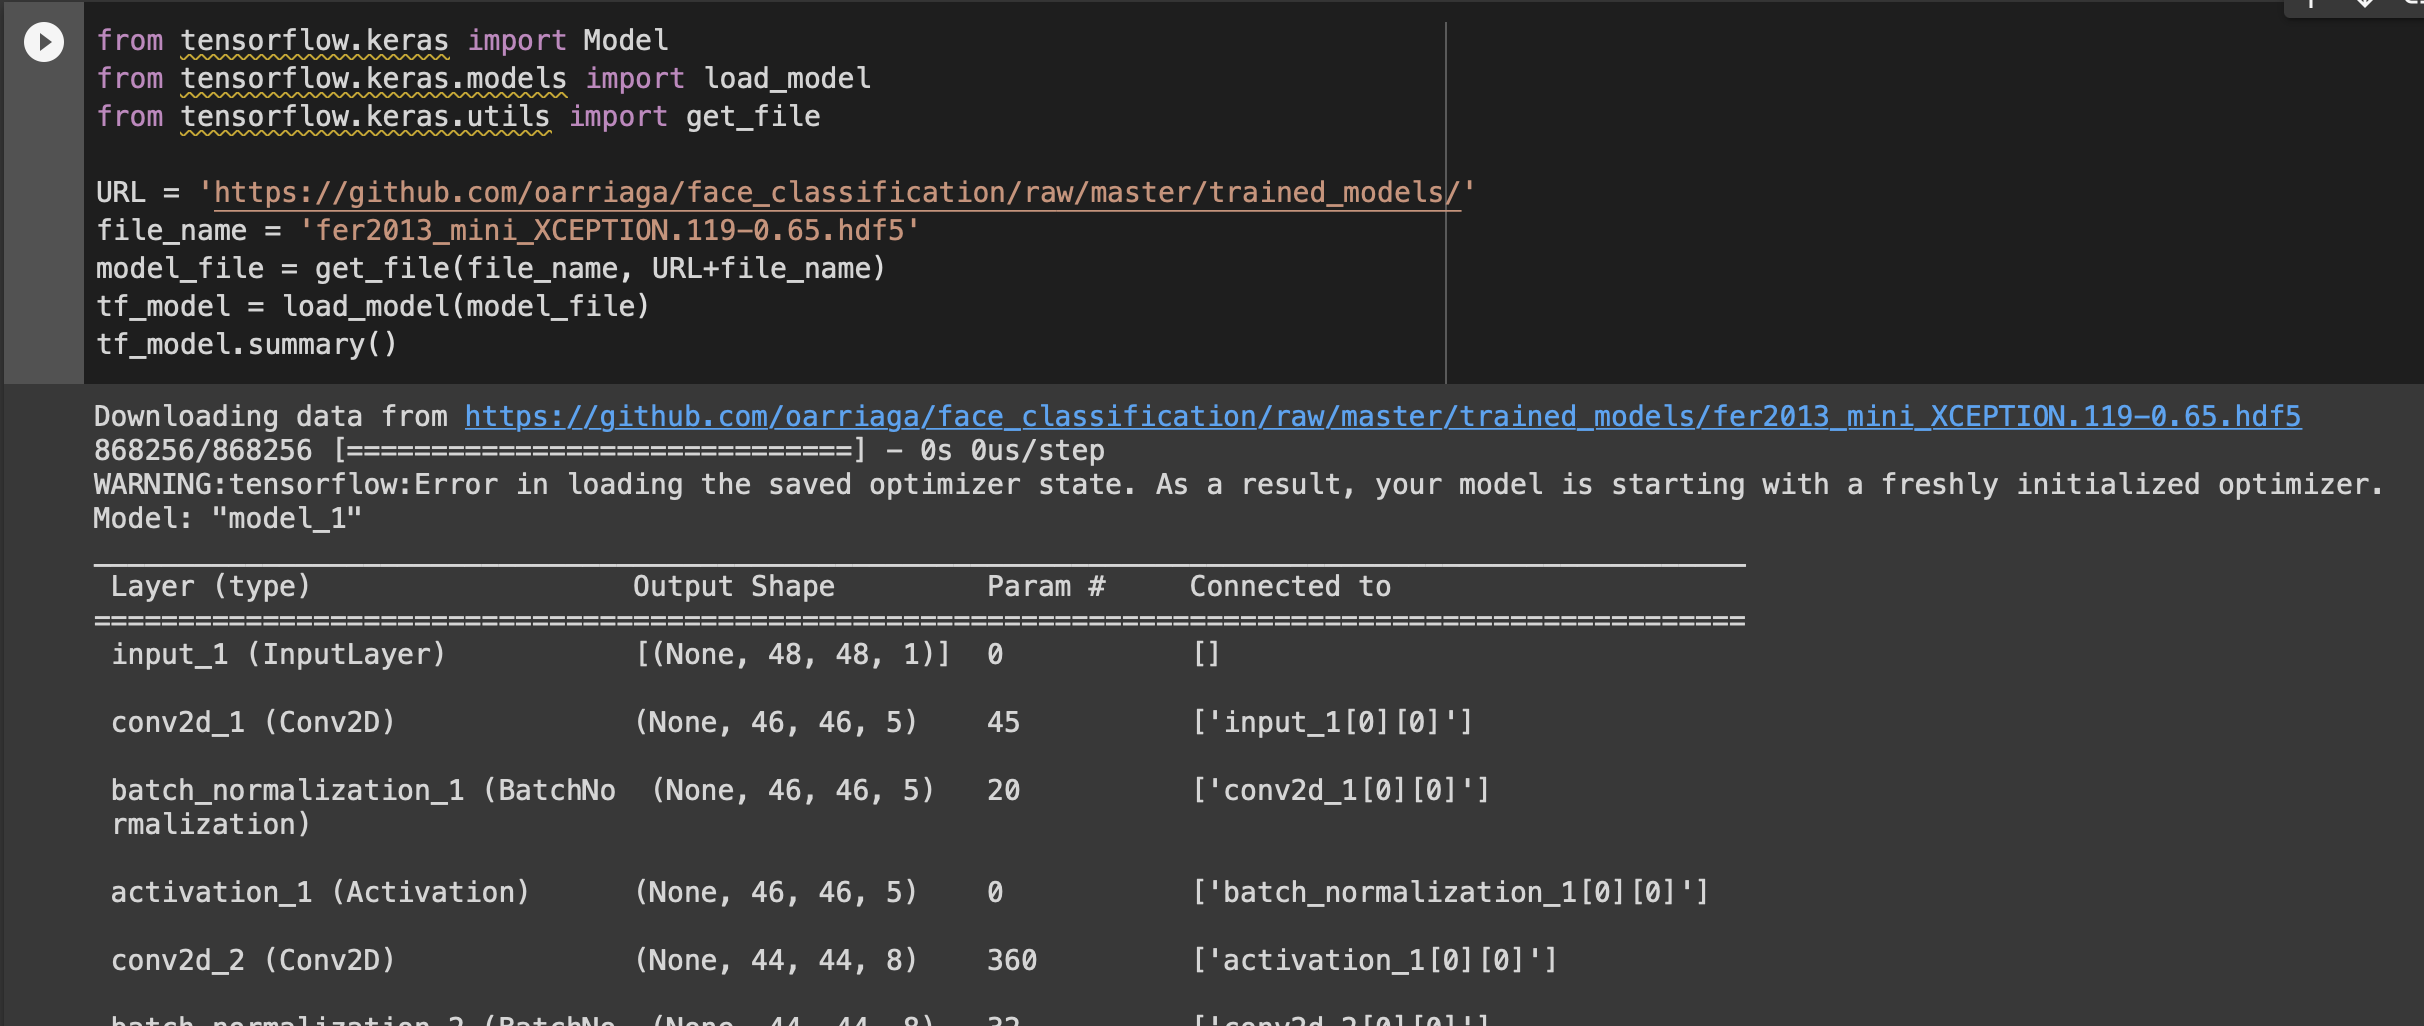
다운로드는 get_file 함수를 사용하고, 모델 로드는 load_model 함수를 사용한다.
from tensorflow.keras import Model
from tensorflow.keras.models import load_model
from tensorflow.keras.utils import get_file

URL = 'https://github.com/oarriaga/face_classification/raw/master/trained_models/'
file_name = 'fer2013_mini_XCEPTION.119-0.65.hdf5'
model_file = get_file(file_name, URL+file_name)
tf_model = load_model(model_file)
tf_model.summary()
.hdf5 파일을 다운로드한 뒤 메모리에 로드까지 성공하였다.
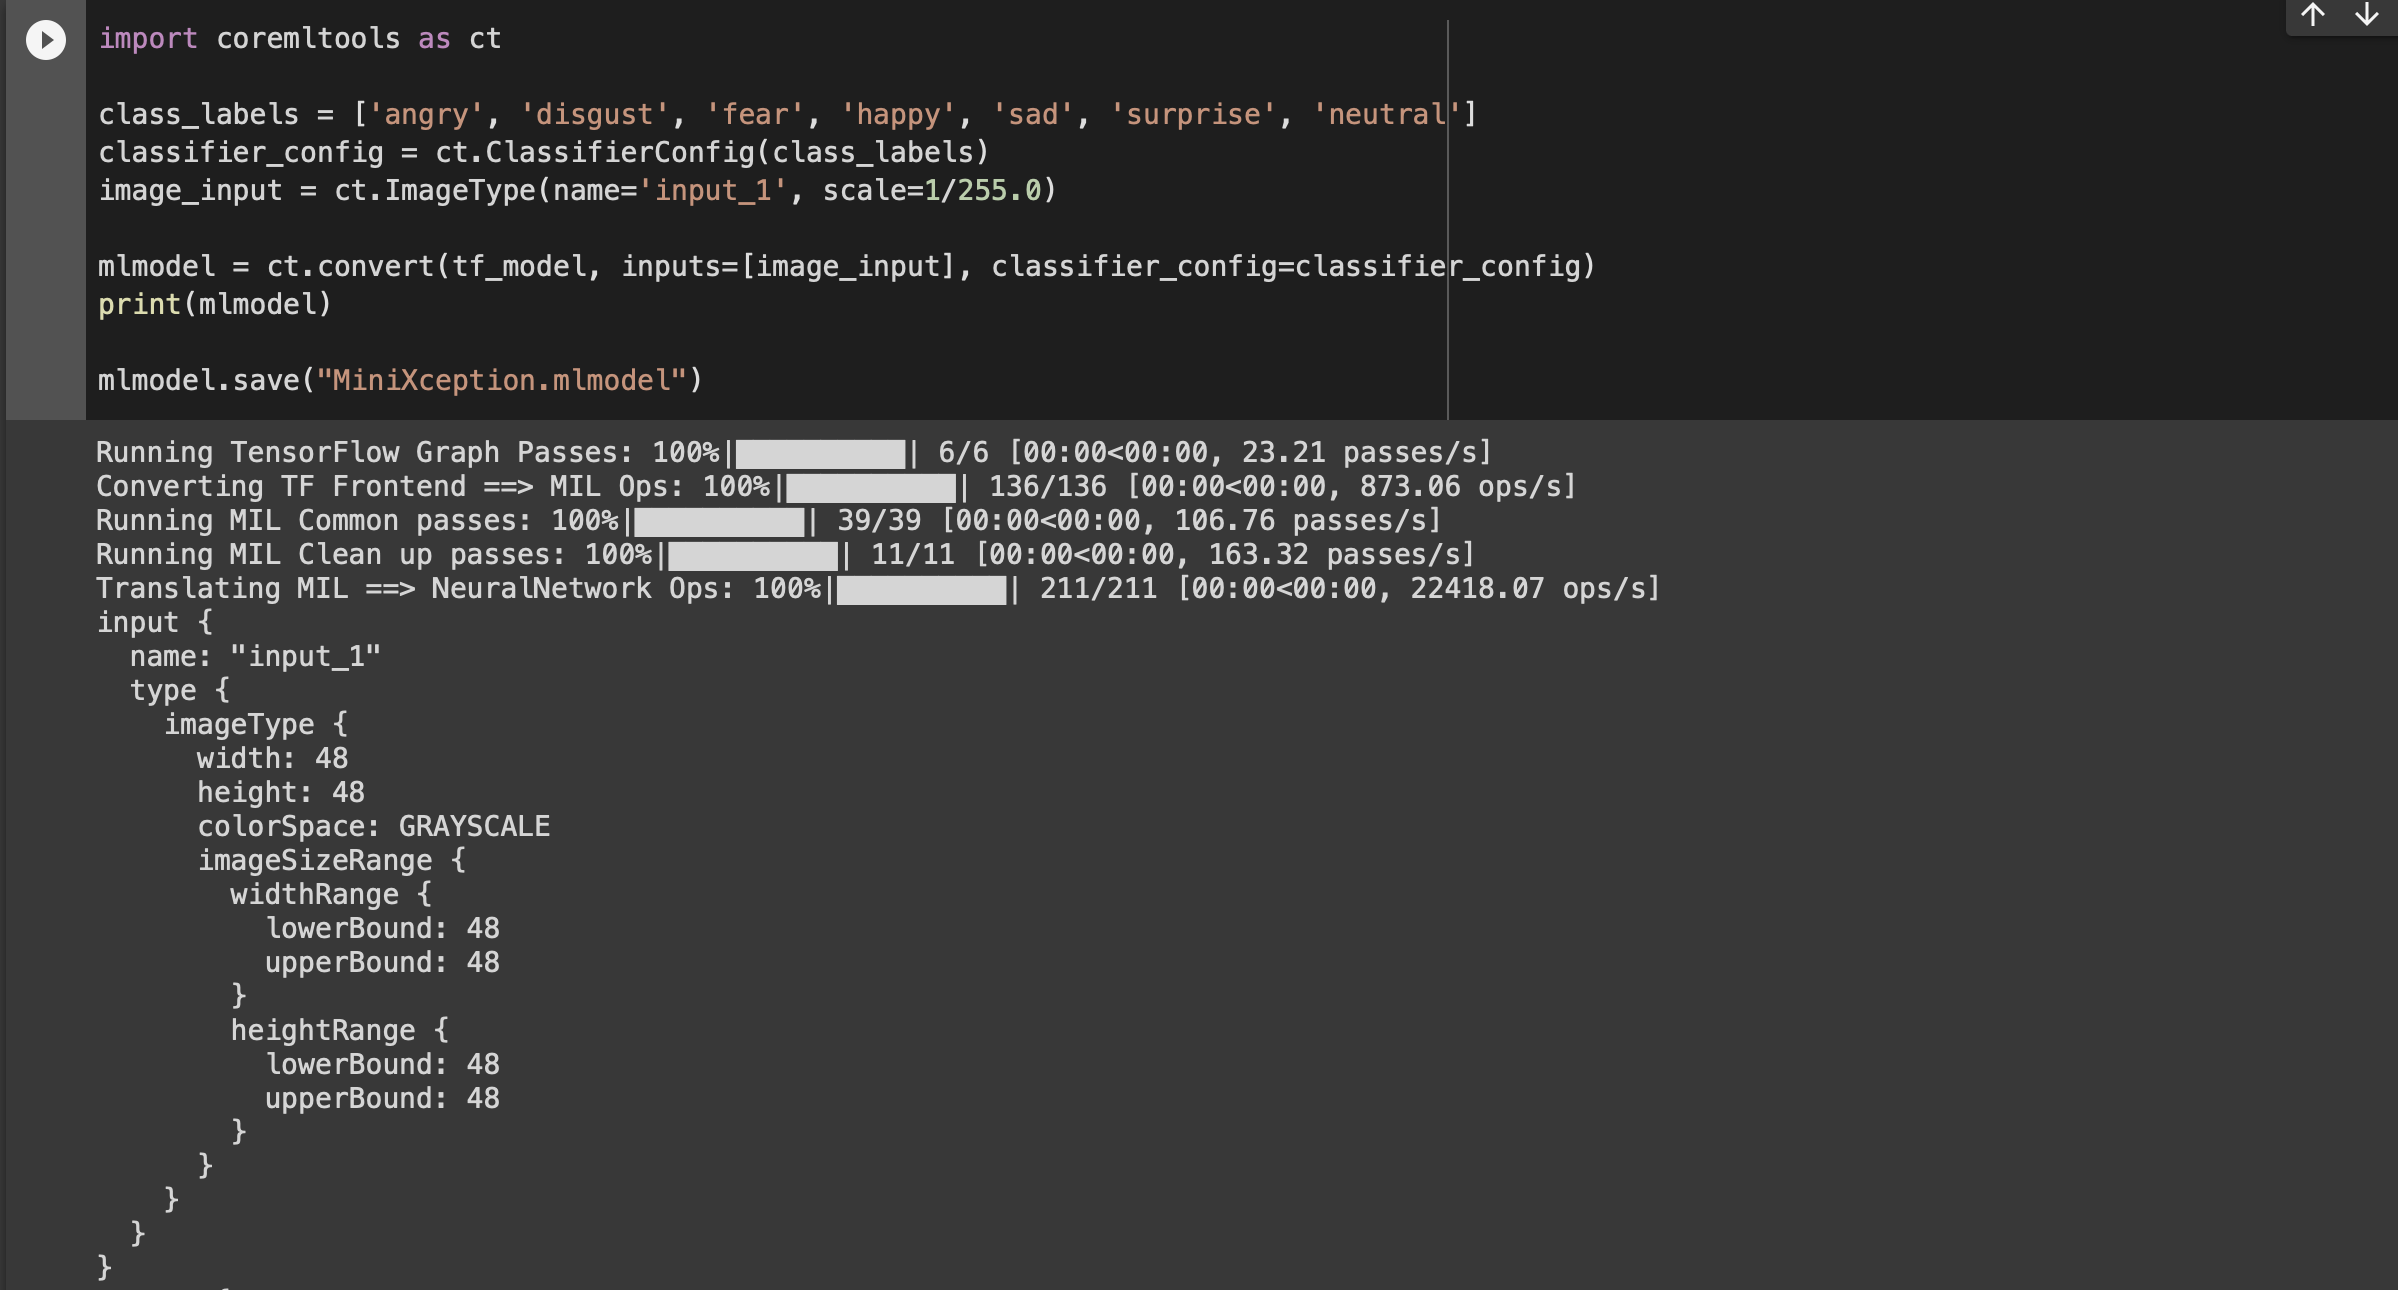
이제 Core ML Tools를 사용해서 변환한 뒤 .mlmodel 파일을 저장하자.
전체 코드는 아래와 같다. 코드 설명은 나중에 할 거다.
일단 실행해서 MiniXception.mlmodel을 다운로드하여 두자.
import coremltools as ct

class_labels = ['angry', 'disgust', 'fear', 'happy', 'sad', 'surprise', 'neutral']
classifier_config = ct.ClassifierConfig(class_labels)
image_input = ct.ImageType(name='input_1', scale=1/255.0)

mlmodel = ct.convert(tf_model, inputs=[image_input], classifier_config=classifier_config)
print(mlmodel)

mlmodel.save("MiniXception.mlmodel")
실행해보면 다음과 같이 잘 변환된다.
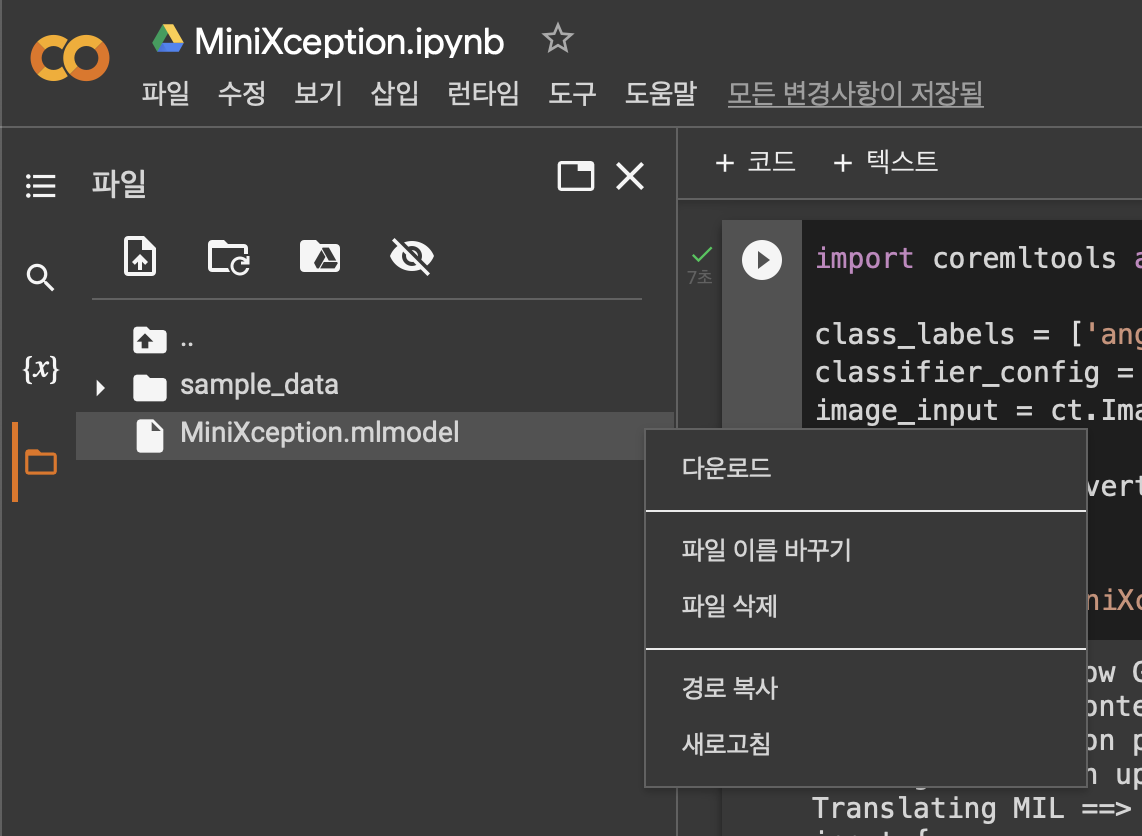
왼쪽 파일 탐색으로 가보면 MiniXception.mlmodel 파일이 생겨있다.
[다운로드]를 눌러 로컬에 다운로드하자.
그리고 다운로드한 mlmodel을 실행시켜보자.
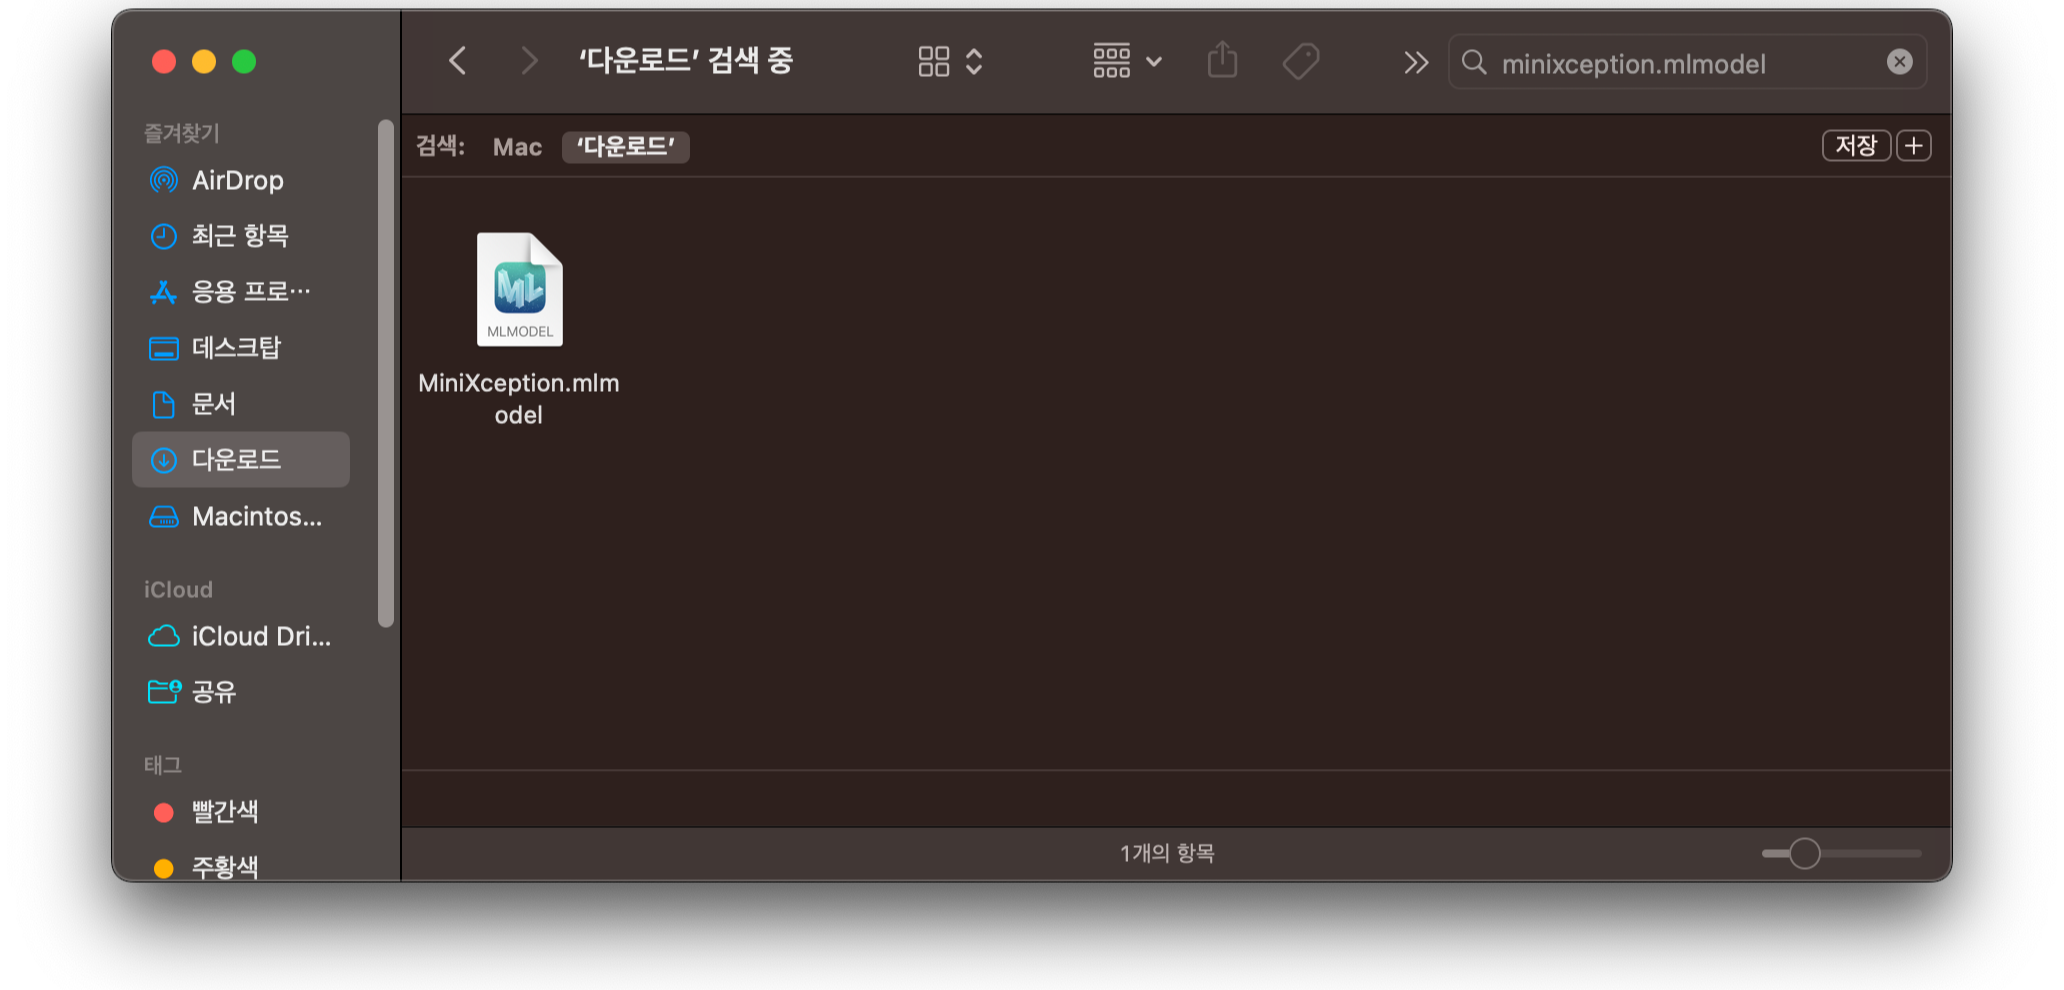
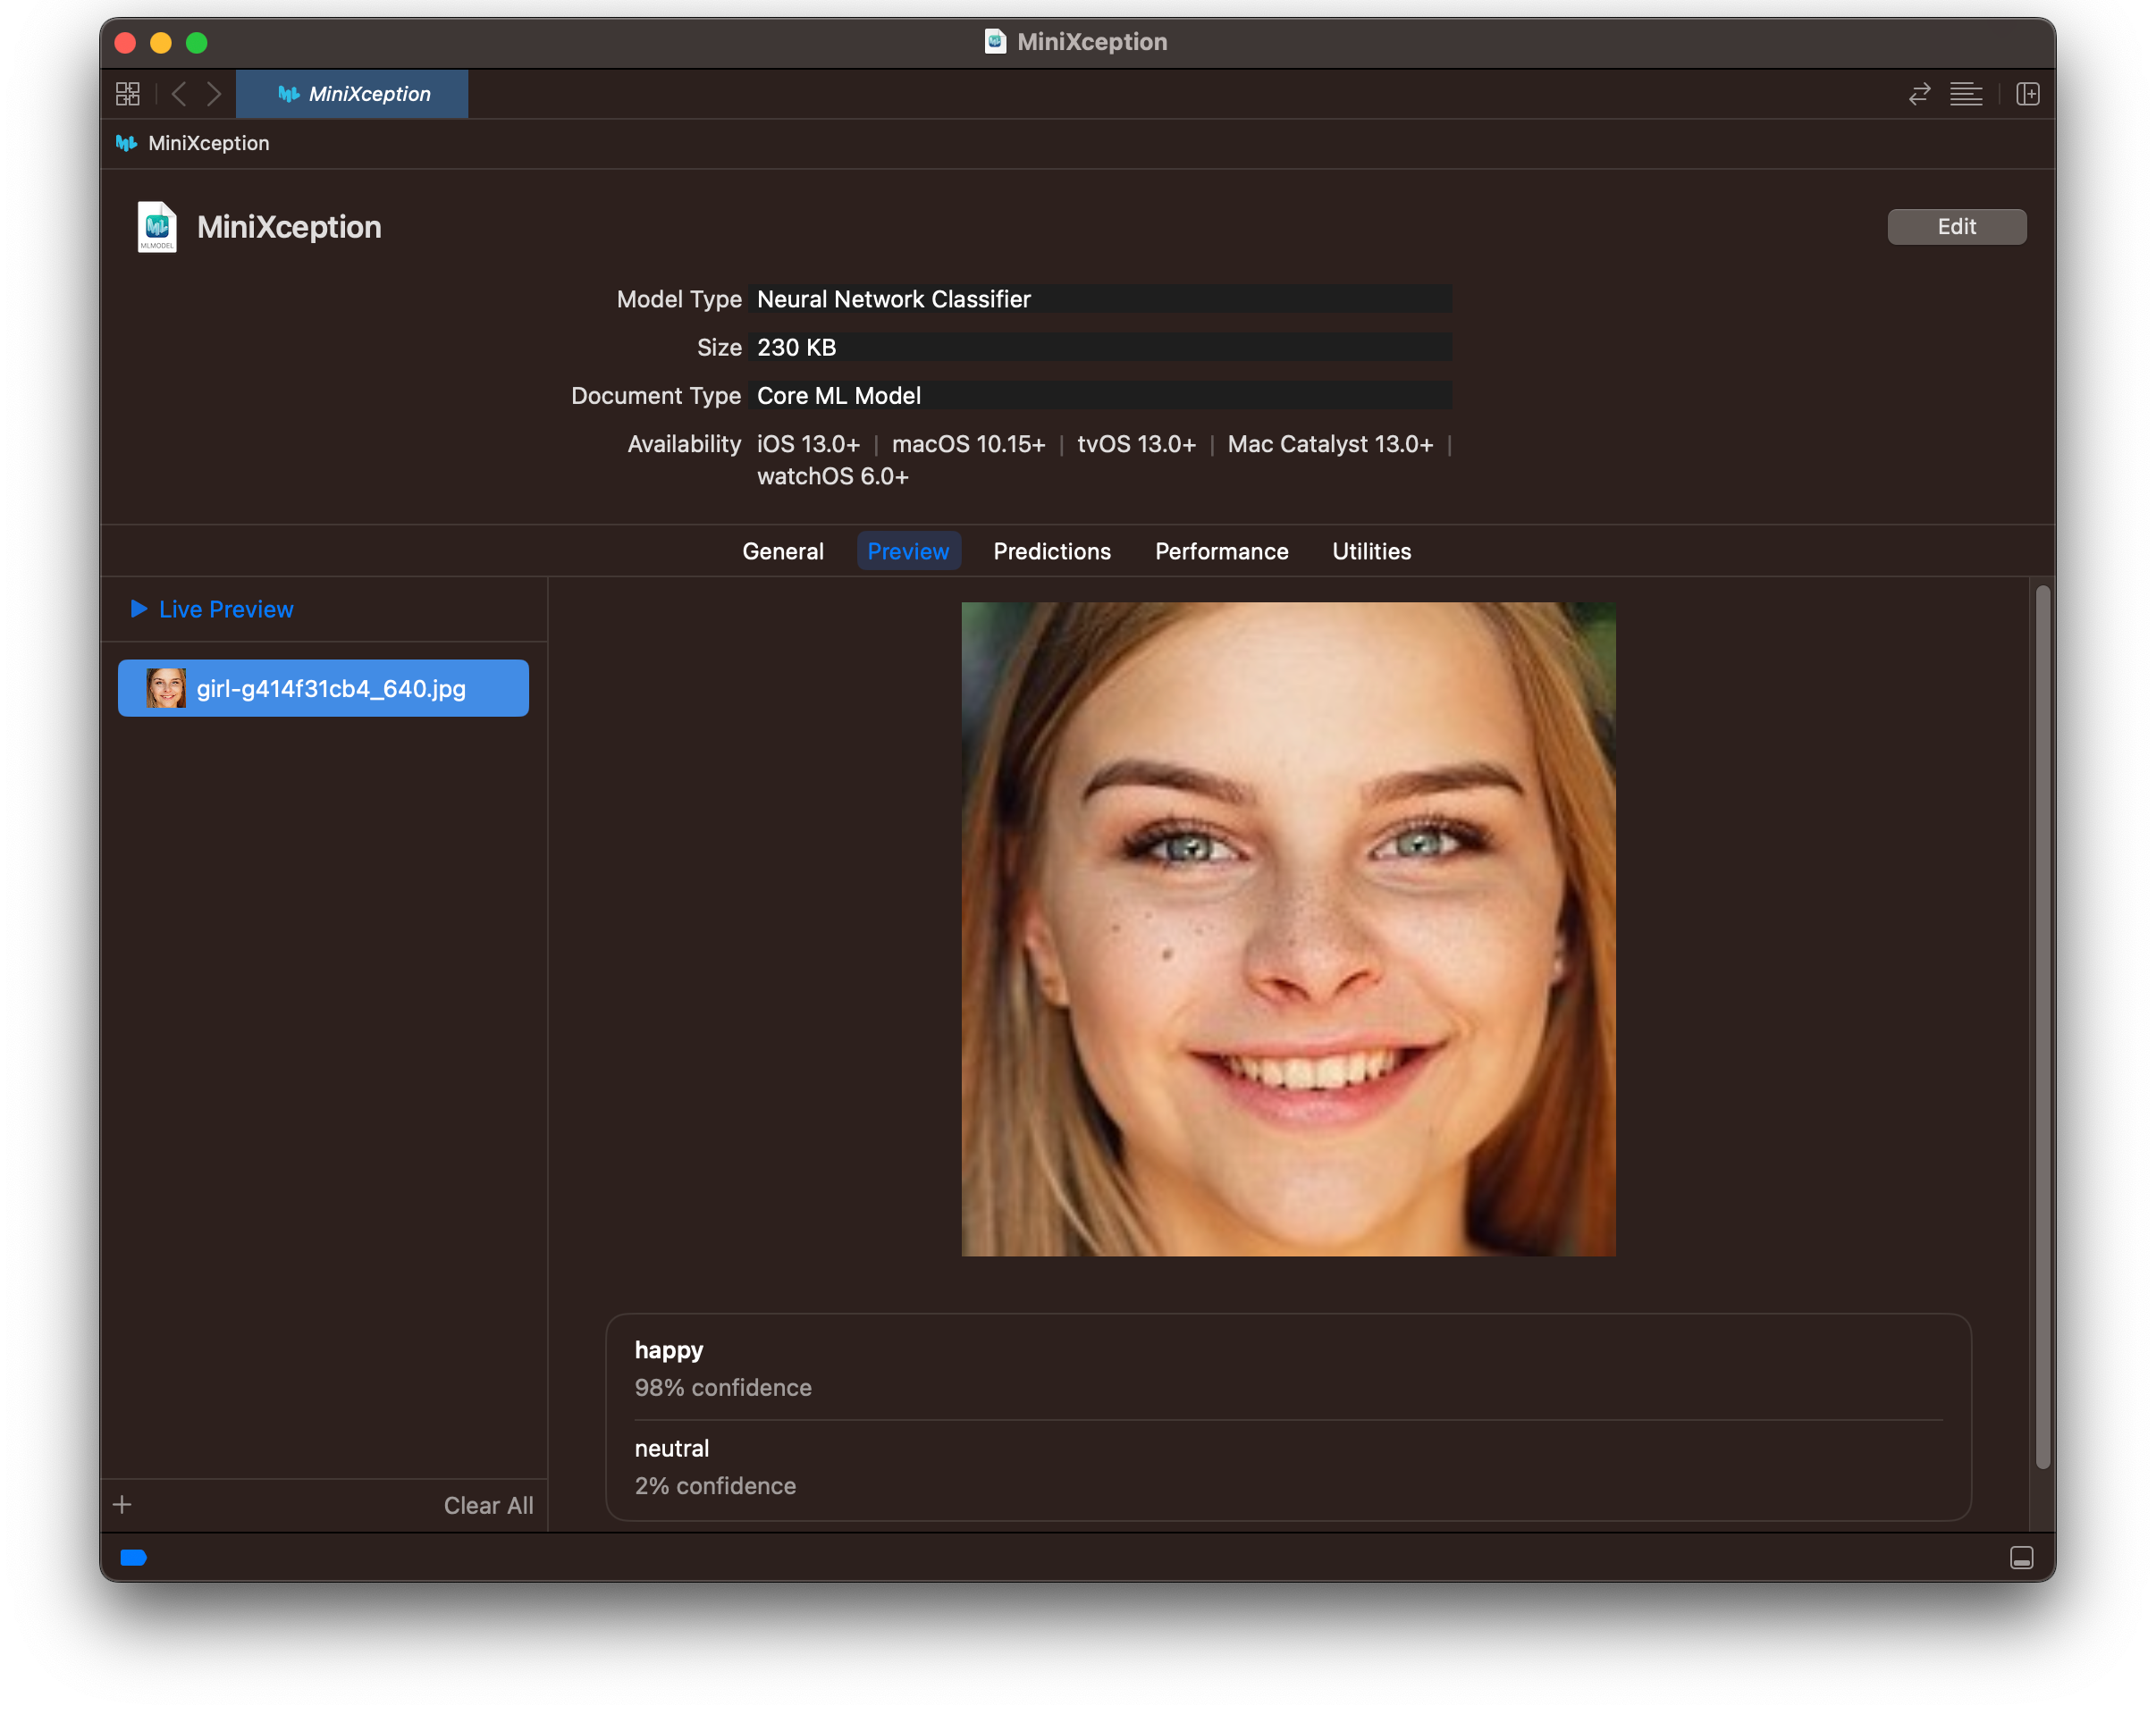
그럼 이렇게 Xcode에서 열리게 된다.
신기하게도 용량이 230KB로 엄청 작다.

[Preview] 탭으로 가서 모델이 잘 작동하는지 한번 확인해보자.
왼쪽에 이미지 파일을 드래그 앤 드롭으로 추가하면 바로 결과가 나타난다.
웃고 있는 여자 사진을 넣었더니 98%의 confidence로 happy가 나왔다.
다른 표정으로 하나 더 해보자.
놀란 표정의 남자 사진을 넣었더니 surprise 88%가 나왔다.
잘 동작하는 것 같다.

다른 탭들도 살펴보자.
[General > Labels]에서는 Classification에 사용되는 라벨을 확인할 수 있다.
아까 코드에서 지정해준 것과 같은 순서로 되어있다.
[General > Distribution]에서는 레이어 구조를 확인할 수 있다.
보면 Convolution 레이어가 23개 사용되었다.


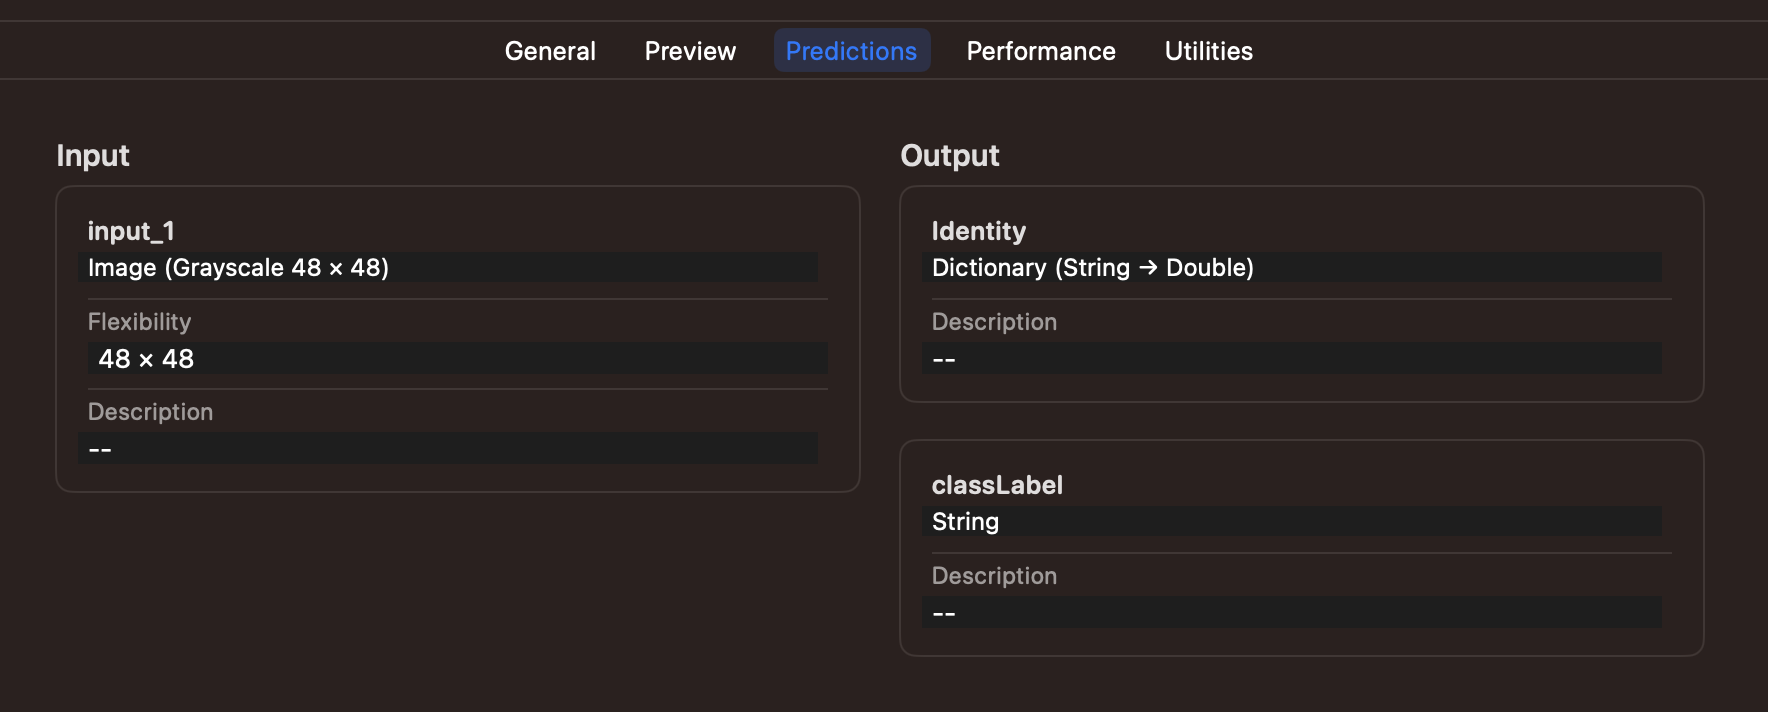
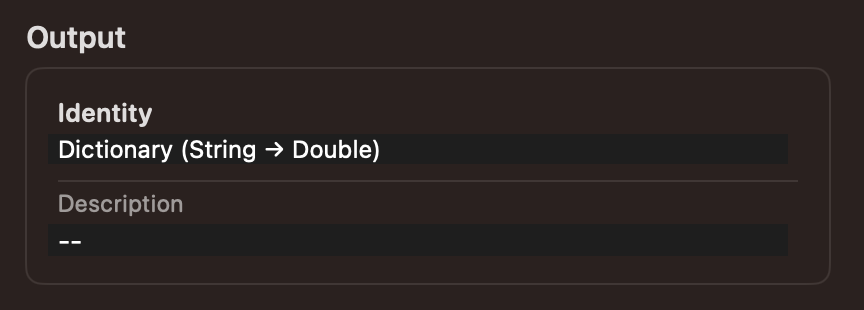
[Predictions]에서는 Input과 Output 타입을 확인할 수 있다.
Input은 Image (Grayscale 48 x 48)이고, Output은 [String:Double] 딕셔너리이다.
그럼 갑자기 아까 (RGB 182 x 182) 사진으로 프리뷰를 돌렸는데 왜 결과가 잘 나왔는지 의문이 들게 된다.
Vision 프레임워크가 알아서 Resize and Crop을 해주기 때문에 결과가 잘 나온 것 같은데, Grayscale까지 해주는지는 모르겠다.
근데 일단 결과는 잘 나와서.. 나중에 더 찾아봐야겠다.
이제 아까 미뤄뒀던 코드를 설명할 시간이다.
1) ImageType 설정
[Predictions]에서 확인한 input 타입은 Image (Grayscale 48 x 48)이다.
이것은 우리가 convert 할 때에 inputs를 ImageType으로 지정해주었기 때문인데
image_input = ct.ImageType(name='input_1', scale=1/255.0)
mlmodel = ct.convert(tf_model, inputs=[image_input], classifier_config=classifier_config)
Grayscale 48x48은 원본 TensorFlow 모델의 input shape이다.

굳이 ImageType으로 지정해준 이유는 prediction 할 때 CVPixelBuffer를 input으로 사용하기 쉬워지기 때문이다.
만약 ImageType으로 지정해주지 않으면 이렇게 input 타입이 MultiArray가 되는데,
Core ML Tools 공식 문서를 보면 다음과 같은 내용이 있다.
비효율적인 MLMultiArray 복사 작업은 모델의 병목 현상이 될 수 있습니다. ImageType을 사용하는 것은 CVPixelBuffer 유형의 입력을 Core ML 예측 API에 복사하는 효율적인 방법입니다.
그리고 Preview 기능은 정해진 Input, Output 타입에 대해서만 사용할 수 있는데,
MultiArray input은 프리뷰를 지원하지 않아 프리뷰 탭이 사라진 것을 볼 수 있다.

다시 이 코드로 돌아와서,
image_input = ct.ImageType(name='input_1', scale=1/255.0)
mlmodel = ct.convert(tf_model, inputs=[image_input], classifier_config=classifier_config)
input type 설정에서 가장 중요한 것은 scale=1/255.0 부분이다.
scale 설정을 해주지 않으면 결과가 제대로 나오지 않는다.
scale 설정을 빼먹었을 때는 모든 사진이 다 surprise라고 나왔다.
처음에는 모델 변환이 잘못된 줄 알았는데 이 글을 보고 원인을 알게 되었다.
원본 TensorFlow 모델의 사용 코드를 보자.
prediction을 하기 전에 preprocess_input, 전처리를 하고 있다.

그리고 전처리 함수를 보면 255.0으로 나누어 각 픽셀 값이 0~1 값이 되도록 작업해준다.
따라서 Core ML에서도 똑같이 전처리를 해준 뒤에 Prediction 해야 올바른 결과를 얻을 수 있는 것이다.

2) Classification Labels 설정
다음은 Classification Labels 관련 코드를 살펴보자.
우리는 FER-2013 데이터셋을 가지고 학습시킨 모델을 사용하고 있으므로, 이 데이터셋의 label 구성을 알아야 한다.
찾아보면 0=angry, 1=disgust, ..., 6=neutral로 정해져 있다.
따라서 이 순서로 라벨 문자열을 담은 배열 class_labels를 만들어준 뒤,
class_labels를 가지고 ClassifierConfig를 만들어준다.
그리고 convert 할 때 classifier_config 파라미터에 만든 configuration을 넘겨주면
class_labels = ['angry', 'disgust', 'fear', 'happy', 'sad', 'surprise', 'neutral']
classifier_config = ct.ClassifierConfig(class_labels)
mlmodel = ct.convert(tf_model, classifier_config=classifier_config)
출력을 딕셔너리 형식 [Class Name: Confidence]으로 자동으로 래핑 해준다.
classifier_config을 설정해주지 않으면 input처럼 MultiArray 타입이 돼서
번거롭게 수동으로 Class Name과 Confidence를 매핑해주어야 한다.
이제 마지막으로 프로젝트에 MiniXception.mlmodel을 추가해주고 마치자.
SeeSo 프레임워크를 추가했던 것처럼 그냥 드래그 앤 드롭으로 옮겨주면 된다.

3-2. Predictor 구현
ML 모델을 사용해서 Prediction을 수행하는 Predictor를 구현해주자.
이 단계는 공식 문서의 샘플 프로젝트의 코드를 거의 그대로 사용했다.
다음과 같은 클래스 FaceExpressionPredictor을 추가한다.
import Foundation
import Vision

class FaceExpressionPredictor {
    static func createFaceExpressionClassifier() -> VNCoreMLModel {
        guard let miniXception = try? MiniXception(configuration: MLModelConfiguration()),
              let miniXceptionVisionModel = try? VNCoreMLModel(for: miniXception.model) else {
            fatalError("Failed to create a MiniXception")
        }

        return miniXceptionVisionModel
    }

    static let faceExpressionClassifier = createFaceExpressionClassifier()

    struct Prediction {
        let classification: String
        let confidencePercentage: String

        var predictionResultString: String {
            return classification + ": " + confidencePercentage + "%"
        }
    }

    typealias FaceExpressionPredictionHandler = (_ predications: [Prediction]?) -> Void

    private func createFaceExpressionClassificationRequest(predictionHandler: @escaping FaceExpressionPredictionHandler) -> VNImageBasedRequest {
        let faceExpressionClassificationRequest = VNCoreMLRequest(model: Self.faceExpressionClassifier) { (request, error) in
            var predictions: [Prediction]? = nil

            defer {
                predictionHandler(predictions)
            }

            if let error = error {
                print("Vision image classification error...\n\n\(error.localizedDescription)")
                return
            }

            if request.results == nil {
                print("Vision request had no resuls")
                return
            }

            guard let observations = request.results as? [VNClassificationObservation] else {
                print("VNRequest produced the wrong result type: \(type(of: request.results))")
                return
            }

            predictions = observations.map { observation in
                Prediction(classification: observation.identifier,
                           confidencePercentage: observation.confidencePercentageString)
            }
        }

        faceExpressionClassificationRequest.imageCropAndScaleOption = .centerCrop
        return faceExpressionClassificationRequest
    }

    func makePredictions(for photo: CGImage, completionHandler: @escaping FaceExpressionPredictionHandler) throws {
        let faceExpressionClassificaitonRequest = createFaceExpressionClassificationRequest(predictionHandler: completionHandler)

        let handler = VNImageRequestHandler(cgImage: photo)
        let requests: [VNRequest] = [faceExpressionClassificaitonRequest]

        try handler.perform(requests)
    }
}
그리고 VNClassficationObservation에 extension으로 confidence를 문자열 타입으로 변환한 프로퍼티를 추가해준다.
extension VNClassificationObservation {
    /// Generates a string of the observation's confidence as a percentage.
    var confidencePercentageString: String {
        let percentage = confidence * 100

        switch percentage {
            case 100.0...:
                return "100%"
            case 10.0..<100.0:
                return String(format: "%2.1f", percentage)
            case 1.0..<10.0:
                return String(format: "%2.1f", percentage)
            case ..<1.0:
                return String(format: "%1.2f", percentage)
            default:
                return String(format: "%2.1f", percentage)
        }
    }
}
이제 구현한 Predictor를 ViewController에 추가해주자.
private let faceExpressionPredictor = FaceExpressionPredictor()
3-3. EmotionInfo 추가
전 단계에서 Predictor 안에 Prediction이라는 타입을 선언해주었다.
이 Prediction을 담는 구조체 EmotionInfo를 만들어주자. WatchingInfo 안에 넣어줄 것이다.
struct EmotionInfo {
    enum EmotionPredictionState: CustomStringConvertible {
        case success
        case faceMissing
        case failedToCropFace
        case noPredictions
        case unknown

        var description: String {
            switch self {
                case .success: return "SUCCESS"
                case .faceMissing: return "FACE_MISSING"
                case .failedToCropFace: return "FAILED_TO_CROP_FACE"
                case .noPredictions: return "NO_PREDICTIONS"
                case .unknown: return "UNKNOWN"
            }
        }
    }

    let emotionPredictionState: EmotionPredictionState
    let predictionResult: [FaceExpressionPredictor.Prediction]

    var predictionDescription: String {
        return predictionResult.reduce("") { $0 + "\t\t\t\t\t\t  "
            + $1.classification.padding(toLength: 10, withPad: " ", startingAt: 0) + ": "
            + $1.confidencePercentage + " %\n"
        }
    }
}
WatchingInfo 안에 emotionInfo 프로퍼티를 추가한다.
var emotionInfo: EmotionInfo?
디버깅을 위해 WatchingInfo.description도 다음과 같이 변경하고,
var description: String {
    return """
    --------------------------------------

    | Play Time |
        \(String(format: "%.2d", Int(playTime/60))):\(String(format: "%.2d", Int(playTime)%60)).\(Int(round(playTime*100))%100) sec
    | Gaze Info |
        Poisition           : \(gazeInfo?.positionDescription ?? "None")
        Tracking State      : \(gazeInfo?.trackingState.description ?? "None")
        Eye Movement State  : \(gazeInfo?.eyeMovementState.description ?? "None")
        Screen State        : \(gazeInfo?.screenState.description ?? "None")
    | Emotion Info |
        Prediction State    : \(emotionInfo?.emotionPredictionState.description ?? "None")
        Prediction Result   :
    \(emotionInfo?.predictionDescription ?? "\tNone")
    --------------------------------------
    """
}
emotionInfo를 업데이트하는 메소드 updateEmotionInfo(with:)를 추가한다.
mutating func updateEmotionInfo(with emotionInfo: EmotionInfo?) {
    self.emotionInfo = emotionInfo
}
ViewController로 이동하여 다음과 같은 watchingInfo.emotionInfo를 업데이트하는 함수를 추가한다.
private func updateWatchingInfo(state: EmotionInfo.EmotionPredictionState, predictions: [FaceExpressionPredictor.Prediction] = []) {
    let emotionInfo = EmotionInfo(emotionPredictionState: state, predictionResult: predictions)
    self.watchingInfo.updateEmotionInfo(with: emotionInfo)
}
3-4. ImageDelegate 구현
이 단계에서 가장 헤맸다.
MiniXception Prediction을 수행하려면 카메라 프레임을 얻어와야 한다.
일반적인 방법인 AVCaptureSession을 사용하려고 했는데,
AVCaptureSession가 제대로 동작을 안 하고 계속 인터럽트로 중단됐다.
인터럽트 원인을 출력해보니 다른 클라이언트에 의해 캡처 디바이스가 이미 사용 중이라고 나왔다.
카메라는 한 번에 한 클라이언트에 의해서만 사용 가능하다.
근데 SeeSo가 이미 시선 추적에 카메라를 사용하고 있다.
그 말은 곧 표정 분석과 시선 추적이 각각 독립적으로 캡처 세션을 돌리는 것은 불가능하다는 말이다.
결국 해결 방법은 SeeSo가 사용하고 있는 AVCaptureSession을 공유해서 쓰는 것뿐이었다.
처음에는 SeeSo의 PreviewLayer에서 참조하고 있는 AVCaptureSession을 훔쳐온 다음,
표정 분석용 VideoOutput을 하나 더 추가하는 괴상한 방법으로 구현했는데,
SeeSo 개발 문서를 자세히 보니 SeeSo가 사용하는 AVCaptureSession의 Sample Buffer를 전달해주는 함수가 있었다.
그 함수가 바로 ImageDelegate의 onImage(timestamp:image:)이다.
공식 문서 한번 읽어보고 가자.
ImageDelegate
전면 카메라에서 이미지 버퍼를 수신하는 프로토콜.
@objc public protocol ImageDelegate: GazeTrackerDelegateonImage
이미지를 CMSampleBuffer 형식으로 제공하는 함수
@objc public func onImage(timestamp: Double, image: CMSampleBuffer)
ViewController에 ImageDelegate를 채택하고 onImage(timestamp:image:)를 구현해주자.
파라미터는 이름 그대로라 설명은 생략한다.
여기서 받은 image을 CVPixelBuffer로 변환하여 MiniXception Prediction을 수행하면 된다.
// MARK: ImageDelegate
extension ViewController: ImageDelegate {
    func onImage(timestamp: Double, image: CMSampleBuffer) {
        DispatchQueue.global().async {
            guard let frame = CMSampleBufferGetImageBuffer(image) else {
                print("ERROR: unable to get image from sample buffer")
                return
            }
            // frame 가지고 prediction
        }
    }
}
이제 구현한 델리게이트를 설정해주자.
onInitialized(tracker:error:)의 setDelegates 함수 호출 부분으로 가서,
nil이었던 ImageDelegate를 self로 수정한다.
func onInitialized(tracker: GazeTracker?, error: InitializationError) {
    if (tracker != nil) {
        self.tracker = tracker
        print("DEBUG: initialized gaze tracker")
        self.tracker?.setDelegates(statusDelegate: self,
                                   gazeDelegate: self,
                                   calibrationDelegate: self,
                                   imageDelegate: self)	// 수정

        DispatchQueue.global().async {
            self.tracker?.startTracking()
        }
    } else {
        print("ERROR: failed to initialize gaze tracker \(error.description)")
    }
}
3-5. 얼굴 크롭 구현
지금 CVPixelBuffer는 왼쪽 사진처럼 얼굴뿐만 아니라 배경과 몸통까지 다 나와있는 상태이다.
Prediction input으로는 오른쪽 사진처럼 얼굴만 크롭 해서 넣어줘야 한다.
따라서 이번 단계에서는 FaceDetection을 사용해서 얼굴만 크롭한 cgImage를 생성하는 작업을 진행해줄 것이다.


FaceDetection은 Vision 프레임워크를 사용하여 구현하였다.
ViewController에 Vision 프레임워크를 import 해주자.
import Vision
ViewController에 카메라 프레임으로부터 FaceDetection을 수행하는 함수 detectFace(in:)을 구현하자.
Face Detection을 위해서 VNDetectFaceLandmarksRequest를 생성한다.
이때 컴플리션 핸들러로 handleFaceDetectionResults(_:image:)를 전달한다.
마지막으로 perform() 해주면 image를 가지고 FaceDetection 수행된다.
/// 카메라 프레임으로부터 얼굴을 탐지한다.
private func detectFace(in image: CVPixelBuffer) {
    let faceDetectionRequest = VNDetectFaceLandmarksRequest(completionHandler: { (request: VNRequest, error: Error?) in
        if let results = request.results as? [VNFaceObservation] {
            self.handleFaceDetectionResults(results, image: image)
        }
    })
    let imageRequestHandler = VNImageRequestHandler(cvPixelBuffer: image, orientation: .leftMirrored, options: [:])
    try? imageRequestHandler.perform([faceDetectionRequest])
}
extension ViewController: ImageDelegate {
func onImage(timestamp: Double, image: CMSampleBuffer) {
DispatchQueue.global().async {
guard let frame = CMSampleBufferGetImageBuffer(image) else {
print("ERROR: unable to get image from sample buffer")
return
}
self.detectFace(in: frame)
}
}
}
아까 지정한 컴플리션 핸들러인 handleFaceDetectionResults(_:image:)를 구현하자.
Face Detection 결과인 VNFaceObservation 타입의 boundingBox 프로퍼티를 통해 얼굴의 위치와 크기를 알 수 있다.
전체 이미지에서 boundingBox만 잘라내주면 얼굴만 크롭되게 되는 것이다.
/// 얼굴 탐지 결과를 바탕으로 얼굴 부분만 크롭한다.
func handleFaceDetectionResults(_ observedFaces: [VNFaceObservation], image: CVPixelBuffer) {
    guard let observedFace = observedFaces.first else {
        self.updateWatchingInfo(state: .faceMissing)
        return
    }

    let ciImage = CIImage(cvPixelBuffer: image).transformed(by: CGAffineTransform(rotationAngle: .pi))
    let cgImage = CIContext().createCGImage(ciImage, from: ciImage.extent)

    guard let cgImage = cgImage?.croppingDetectionBondingBox(to: observedFace.boundingBox) else {
        self.updateWatchingInfo(state: .failedToCropFace)
        return
    }
}
그런데 원래 CGImage에 있는 cropping 메소드를 그대로 사용할 수가 없다.
BoundingBox는 Left Bottom이고 Normalize된 Coordinate에서 정의된 것이기 때문이다.
아래 왼쪽 사진처럼 View와 Screen은 Left Top Cooridnate를 사용한다.
반면 BoundingBox는 Left Bottom Coordinate를 사용하고 width=height=1로 normalize 되어있다.

따라서 좌표 변환을 거친 뒤 cropping 해주는 함수를 구현해야 한다.
CGImage에 Extension으로 croppingDetectionBoundingBox(to:)를 구현해준다.
extension CGImage {
    func croppingDetectionBondingBox(to boundingBox: CGRect) -> CGImage? {
        let width = boundingBox.height * CGFloat(self.width)
        let height = boundingBox.width * CGFloat(self.height)
        let x = (1 - boundingBox.origin.y - boundingBox.height) * CGFloat(self.width)
        let y = boundingBox.origin.x * CGFloat(self.height)

        return self.cropping(to: CGRect(x: CGFloat(self.width) - (x+width),
                                        y: CGFloat(self.height) - (y+height),
                                        width: width,
                                        height: height))
    }
}
이 부분 계산이 복잡하고 더러운 이유는 VNImageRequestHandler의 orientation을 .leftMirrored로 지정해줬기 때문이다.
위에 cropping 전에 갑자기 픽셀 버퍼를 180도 돌린 것도 같은 이유다.
그냥 계산이 쉬워지게 orientation을 바꾸면 되지 않나? 맞다. 바꾸면 된다..
근데 처음에 그걸 깨닫지 못해서 이상한 계산을 저렇게 열심히 만들었다ㅠㅠ
orientation 바꾸고 다시 계산해줘야 하는데 일단 잘 돌아가니 리팩토링 때 고쳐주려고 한다ㅠㅠ
3-6. Prediction 수행
ViewController에 classifyFaceExpression(_:) 함수를 추가한다.
아까 만든 Predictor를 이용하여 Prediction을 수행하고, Prediction 결과를 가지고 watchingInfo를 업데이트하는 함수이다.
/// 표정 분석을 수행한다.
private func classifyFaceExpression(_ image: CGImage) {
    do {
        try self.faceExpressionPredictor.makePredictions(for: image) { [weak self] predictions in
            if let predictions = predictions {
                self?.updateWatchingInfo(state: .success, predictions: predictions)
            } else {
                self?.updateWatchingInfo(state: .noPredictions)
            }
        }
    } catch {
        print("ERROR: Vision was unable to make a prediction...\n\n\(error.localizedDescription)")
    }
}
그리고 handleFaceDectionResults(_:image:)에 classifyFaceExpression(_:)을 호출하는 코드를 추가한다.
DispatchQueue.global(qos: .userInitiated).async {
    self.classifyFaceExpression(cgImage)
}
Prediction 수행하는 부분까지 구현 완료했다.
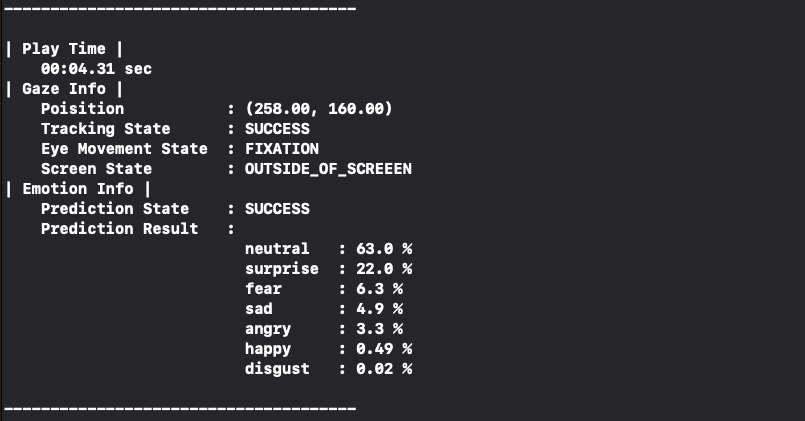
이제 실행해서 표정 분석이 잘 되고 있는지 테스트해보자.
watchingInfo.emotionInfo를 업데이트해주었기 때문에 이제 표정 분석 결과까지 출력된다.
무표정으로 화면을 보고 있으니 neutral 63.0%가 나왔다.
웃어보니 happy 92.3%로 바뀌었다.
잘 작동하고 있는 것 같다.
3-7. 프리뷰 추가
마지막의 마지막 단계이다.
위에서 얼굴을 크롭한 cgImage를 생성했다고 했는데 보질 못하니 제대로 크롭이 된 것인지 의심이 된다.
그래서 프리뷰를 추가해 크롭된 얼굴 이미지와 prediction 결과를 볼 수 있도록 해보자.
UIImageView와 UILabel 하나씩을 왼쪽에 남은 공간에 추가해준다.
(위치가 이상해보이는데 스토리보드 가로 모드에서 safearea가 이상하게 잡혀서 그런 것이다. 무시해도 된다.)

ViewController에 두 뷰에 대한 IBOutlet을 추가한다.
@IBOutlet weak var preview: UIImageView!
@IBOutlet weak var predictionLabel: UILabel!
맨 처음 Calibration에서는 보이면 안 되기 때문에 hidden 처리를 해줘야 한다.
configureSubviews()에 다음 코드 두 줄을 추가한다.
self.hideSubview(self.preview)
self.hideSubview(self.predictionLabel)
그리고 Calibration이 완료되면 보이도록 onCalibrationFinished(calibrationData:)에 다음 코드 두 줄을 추가한다.
self.showSubview(self.preview)
self.showSubview(self.predictionLabel)
이제 prediction 결과가 나올 때마다 preview와 prediction label을 업데이트해주어야 한다.
먼저 prediction label의 경우, watchingInfo.emotionInfo가 변경되면 업데이트해주면 되므로,
updateWatchingInfo(state:predictions:)에 다음과 같은 코드를 추가해준다.
DispatchQueue.main.async {
    if let emotionInfo = self.watchingInfo.emotionInfo,
       let topPrediction = emotionInfo.predictionResult.first {
        self.predictionLabel.text = topPrediction.classification + "\n" + topPrediction.confidencePercentage + "%"
    } else {
        self.predictionLabel.text = "No Predictions"
    }
}
다음 preview는 얼굴 크롭 cgImage를 사용해야 하므로,
handleFaceDetectionResults(_:image:) 함수 내에 다음과 같은 코드를 추가해준다.
DispatchQueue.main.async {
    self.preview.image = UIImage(cgImage: cgImage)
}
이제 마지막 테스트다. 실행해서 프리뷰가 잘 나오는지 확인해보자.
이모티콘으로 가렸지만 실제로는 얼굴만 잘 크롭되어 나오고 있고
무표정 - 웃음 - 놀람 - 무표정의 순서로 짓고 있다.
드디어 모든 기능 구현을 마쳤다.
전체 소스 코드는 아래에서 확인할 수 있다.
GitHub - capstone-nineteen/seeyoutube-client-sample: 전면카메라를 이용하여 시선 추적과 표정 분석을 구현한
전면카메라를 이용하여 시선 추적과 표정 분석을 구현한 토이프로젝트. Contribute to capstone-nineteen/seeyoutube-client-sample development by creating an account on GitHub.
github.com
레퍼런스
https://github.com/youtube/youtube-ios-player-helper
https://developers.google.com/youtube/v3/guides/ios_youtube_helper
https://d2jyd0c50dtn5w.cloudfront.net/wp-content/uploads/2020/08/SeeSo-SDK-가이드북.pdf
https://github.com/visualcamp/SeeSoSample-iOS
https://docs.seeso.io/nonversioning/quick-start/ios-quick-start
https://github.com/apple/coremltools
https://github.com/oarriaga/face_classification
https://arxiv.org/abs/1710.07557
https://coremltools.readme.io/docs
https://machinethink.net/blog/help-core-ml-gives-wrong-output/
https://stackoverflow.com/questions/64759383/bounding-box-from-vndetectrectanglerequest-is-not-correct-size-when-used-as-chil
https://developer.apple.com/documentation/vision/tracking_the_user_s_face_in_real_time
'Apple > iOS' 카테고리의 다른 글
| [iOS] 근접 센서 사용하기 (0) | 2022.07.12 |
|---|---|
| [iOS] 화면 자동 꺼짐 방지 기능 구현하기 (0) | 2022.07.12 |
| [iOS] 이미지 인스타그램 스토리로 공유 기능 구현하기 (0) | 2022.07.07 |
| [iOS] SF Symbols에서 이미지 systemName 확인하기 (0) | 2022.05.30 |
| [iOS] 백그라운드 스레드에서 타이머 돌리기 (0) | 2022.01.15 |


댓글